Create Live Report
The Create Live Report process generates a publishable review of all open reports for uploading to the JMP Live portal or other website designated by your system administrator.
The JMP Live Report
The JMP Live Report, shown below, was generated after running the Demographics Distribution report using the Nicardipine sample data set.

Note: You must be a licensed JMP Live user to create a JMP Live report.
Note: Your JMP Clinical software must be configured for use with JMP Live. Refer to Configuring JMP Clinical for Use with JMP Live for more information.
See JMP Live Help for more information and instructions about using JMP Live.
Generating and Publishing a JMP Live Report
| 8 | Click the  action button at the top of any JMP Clinical review. action button at the top of any JMP Clinical review. |
The Create Live Report window opens.
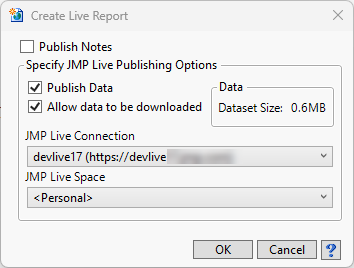
Report Options
The following options enable you to tailor the JMP Live report to your specific needs:
Publish Notes
| 8 | Check the box to append the study notes to the end of your JMP Live report. |
Publish Data
| 8 | Check the box to include all data sets with your JMP Live report. |
Allow data to be downloaded
| 8 | Check the box to enable viewers of your JMP Live report to download the data sets. |
Data
The size of your data set(s) is shown as the Data Size:.
JMP Live Connection
Displays the URL to which you are publishing.
JMP Live Space
Use this widget to specify the folder within the server where your report will be placed.
Configuring JMP Clinical for Use with JMP Live
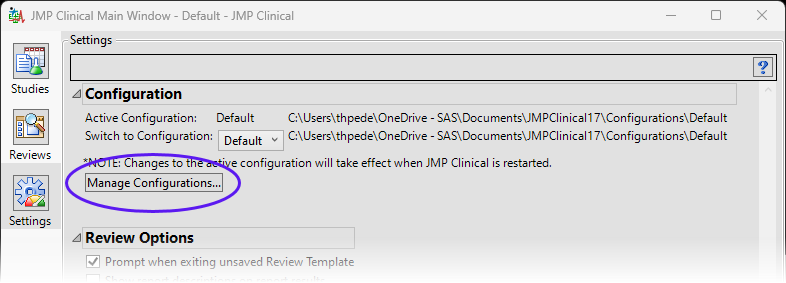
You must configure JMP Clinical software for JMP Live before you can create a JMP Live report.
| 8 | Open JMP Clinical and click on the Settings button. |
| 8 | Click |
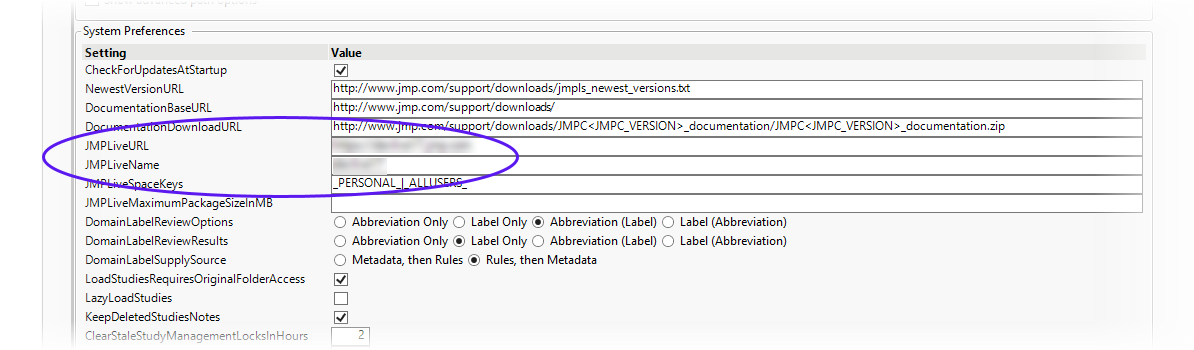
| 8 | Add your assigned JMP Live URL and JMP Live Name to the appropriate rows in the System Preferences box on the Manage Configurations window. |
| 8 | Click to close the Manage Configurations window. |
Note: The JMP Live URL is the URL to the JMP Live instance. If more than one JMP Live instance, separate with vertical bars (|). The JMP Live Name is the name of your choice corresponding to each JMP Live instance. If more than one JMP Live instance, separate with vertical bars (|).
Note: Consult your System Administrator for your assigned JMP Live URL and JMP Live Name.
Note: You must close and relaunch JMP Clinical for changes to the Settings tab and Manage Configurations window to take effect.