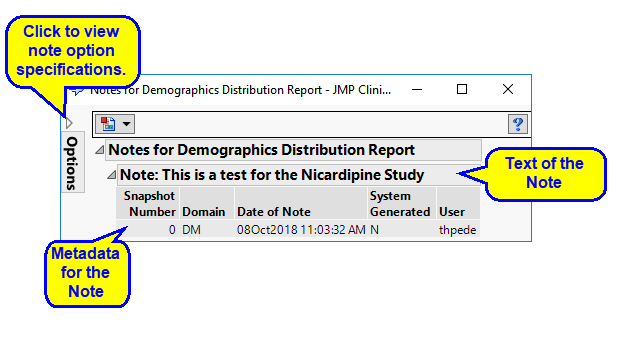
The View Notes option provides a customized context-specific display of Clinical notes.
|
|
Click
|
|
|||
|
|||
|
|||
|
|||
|
|||
|
|||
|
|
|
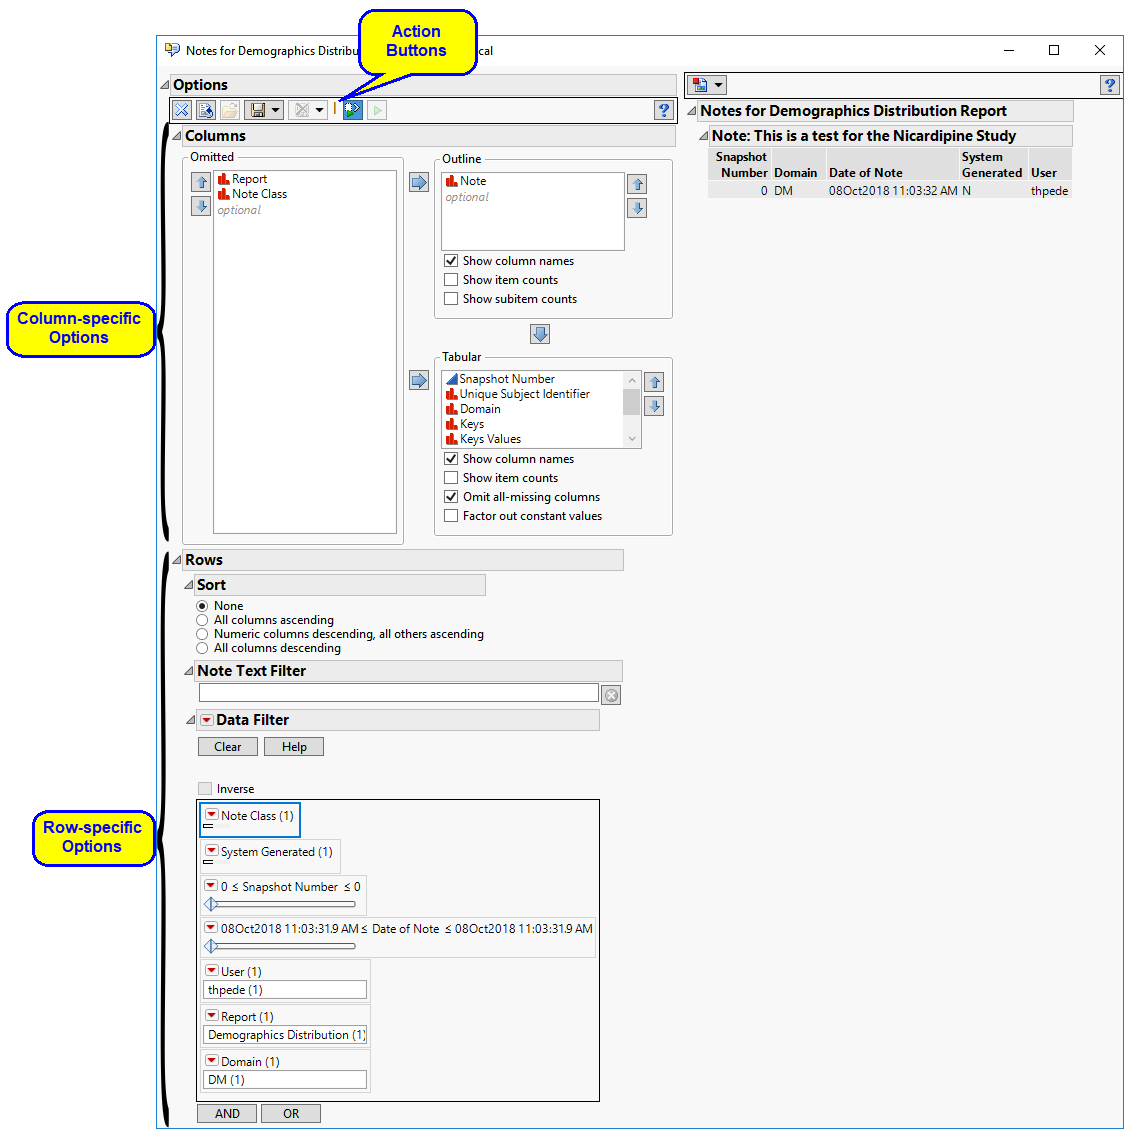
Click the Options tab to expand the dialog and reveal both Action buttons and column- and row-specific options.
|
|
•
|
Clear: Click
|
|
•
|
Reset: Click
|
|
•
|
Load: Click
|
|
•
|
Save Options…: Click
|
|
•
|
Delete Saved Options…: Click
|
|
•
|
Turn on/off auto-run: causes any option change to immediately update the notes summary. Clicking
|
Each note context offers a different set of columns from which you can choose to display in an Outline role, a Tabular role, or to omit. Click to select column(s) and use the arrow buttons to move them to different roles. The order within Outline roles is from highest to lowest outline level. The order within Tabular roles is from left to right within each table.
The Column options are described in the following table:
|
|||
|
|||
|
|||
|
|||
|
|||
|
|||
|
The Rows functions are described in the following table:
|
|||
|
|||
|
|||
|
|||
|
Note: You must select at least one row, point, bar, and so on, for this option to become active.
|