Whenever a user runs a report, metadata about the execution is captured. The location for these metadata are controlled by a path setting in the installation.path.preferences file. The value of the /user/lifesciences/processresults key defines the location. By default, that value is <userLifeSciencesRoot>\ProcessResults\<USER>. For the Default configuration, that will resolve to: <DOCUMENTS>\JMPClinical\Configurations\Default\ProcessResults\<USER>.
Within that folder, each study has its own subfolder. Within each study subfolder, there are three files: _processinfo.sas7bdat, _processinfo2.sas7bdat, and StudyLog.txt. These file contain the execution details for each report the user ran.
There are two files in your JMP Clinical installation folder (normally C:\Program Files\SASHome\JMPClinical\12\LifeSciences) that tell JMP Clinical where to look for your studies and where the output data, reports, notes, and so on, are to be placed.
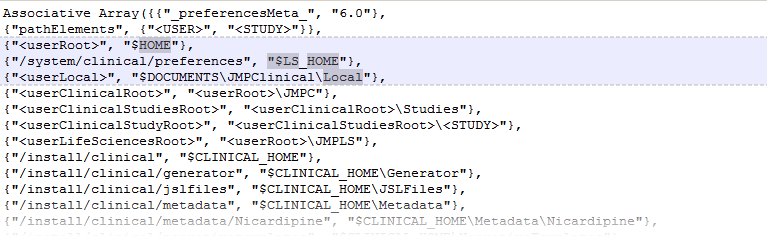
The first of these files, installation.path.preferences tells JMP Clinical where to find the file paths to the locations of all of your studies and other need information. A portion of the default installation.path.preferences file is shown below:
The second file, installation.configuration.preferences is shown below:
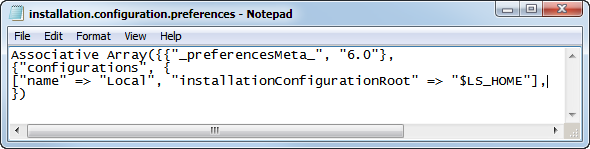
This file tells JMP Clinical where to find installation.path.preferences file for each of the locations configured for your JMP Clinical installation.
Note: There is a separate installation.path.preferences file for each local and shared configuration for JMP Clinical. Conversely, there is only one installation.configuration.preferences file.
To set up a shared location for your studies, you must first map a location on a shared drive and then modify the installation.configuration.preferences file that is installed with JMP Clinical.
Examine the installation.configuration.file shown below:
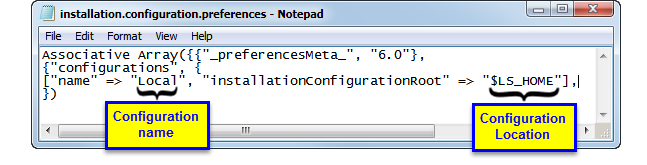
[“name” => “Local”, “installationconfigurationroot” => “$LS_HOME”]
This line defines both the name and location of the default configuration. In this case, the name of the configuration is Local and it is located in the $LS_HOME, which in the default installation is set to C:\Program Files\SASHome\JMPClinical\12\LifeSciences\. This is the location shown on the JMP Clinical Settings tab, as shown below:

|
|
Navigate to the JMP Clinical installation folder (normally C:\Program Files\SASHome\JMPClinical\12\LifeSciences) on your local machine and open the installation.configuration.preferences file with a text editor.
|
[“name” => “Local”, “installationconfigurationroot” => “$LS_HOME”],[“name” => “Local”, “installationconfigurationroot” => “$LS_HOME”]
|
|
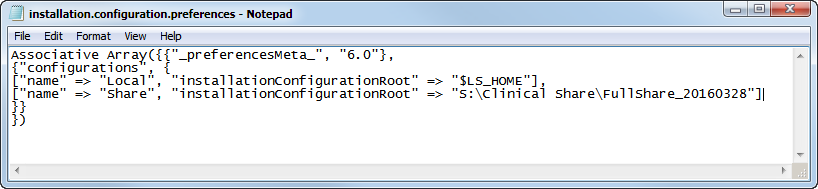
Change the name and location in the pasted copy to the name and location of the share. In this case the name is Share and the location is S:\Clinical Share\FullShare_20160328. Your name and location must be enclosed by the quotation marks. The modified statement should appear as shown below:
|
[“name” => “Share”, “installationconfigurationroot” => “S:\Clinical Share\FullShare_20160328”]
Note: Entries are case-sensitive.
Caution: In the example shown here, the location is specified using a mapped drive path. Locations should contain mapped drive paths only if your organization's setup guarantees that all users have the same mapped drives. If you are unsure, you should use the UNC path instead.
|
|
The new “Share” configuration is now shown as an option.

|
|
Select Share.
|
You must close and reopen JMP Clinical before the new selection takes effect. If the new Share folder is an existing shared folder, studies contained within the folder are displayed on the Studies tab. If this is a new shared folder, JMP Clinical adds the necessary components for the folder to function as a shared studies folder.
Note: Anyone with Read/Write privileges on the shared drive has access to a new shared folder. As the creator of this folder you can control level of access by changing the permissions using WinO/S commands.
JMP Clinical saves and stores all of your configuration variations in a file called installation.configuration.preferences. This file is located in your product home directory (typically C:\Program Files\SASHome\JMPClinical\12\LifeSciences).
When you open JMP Clinical for the first time, the software generates a backup copy of the installation.configuration.preferences file, called installation.configuration.preferences.backup, and saves it in your Documents folder (C:\Users\username\Documents\JMPClinical). Every time, thereafter, that you open JMP Clinical, the software compares the date-time stamps of the installation.configuration.preferences file and the installation.configuration.preferences.backup file. If it finds them to be different, such as would occur when you add or modify configurations, JMP Clinical immediately generates a backup copy of the installation.configuration.preferences.backup file, naming it installation.configuration.preferences.previousbackup, and stores it in the same location. It then overwrites the existing installation.configuration.preferences.backup file with one that is identical to the installation.configuration.preferences file. The installation.configuration.preferences.previousbackup file is always a copy of the penultimate version of the installation.configuration.preferences file.
When you re-install JMP Clinical or update to a newer version, you also install a new copy of the installation.configuration.preferences file containing only the default configuration. To restore your previous configurations, delete the new installation.configuration.preferences file, copy, and paste the installation.configuration.preferences.previousbackup file into the C:\Program Files\SASHome\JMPClinical\12\LifeSciences directory and rename it installation.configuration.preferences. Close and reopen JMP Clinical and you should find that your configurations have been restored.
Refer to Working with JMP for information about accessing basic JMP functionality.
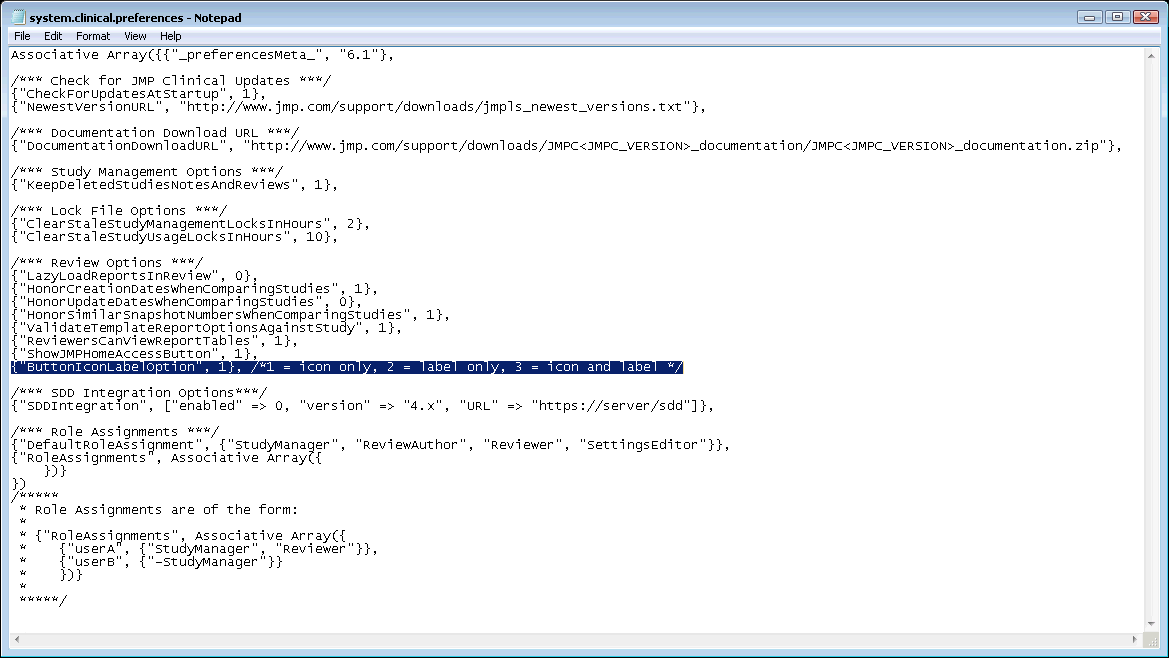
By default, JMP Clinical represent action buttons using icons. You can view the button label by positioning your pointer over the icon. You can change this display if you would prefer to display the label in place of or in addition to the icon. To make this change, you must modify the system.clinical.preferences file (the default local location for this file is the C:\Program Files\SASHome\JMPClinical\12\LifeSciences directory).
|
|
Open the system.clinical.preferences file with a text editor.
|
|
|
To view button labels in place of icons, change the text {“ButtonLabelOption”, 1} to {“ButtonLabelOption”, 2}. The buttons appear as shown below:
|
|
|
To view button labels and icons, change the text {“ButtonLabelOption”, 1} to {“ButtonLabelOption”, 3}. The buttons appear as shown below:
|
Note: You must include the quotation marks as shown in the text above. Entries are case-sensitive.
|
|
Save and close the system.clinical.prefereneces file.
|
|
|
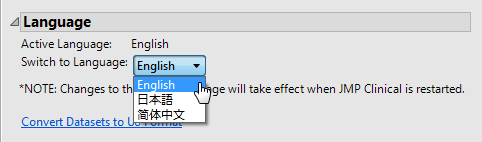
Use the Switch to Language drop-down menu to change language usage by JMP Clinical.
|
|
|
Navigate to your SAS Software Depot (typically found at C:\SAS Software Depot) and double-click
|
|
|
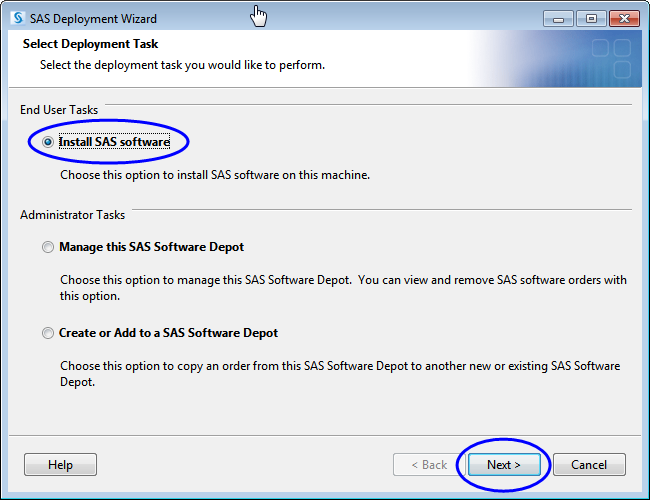
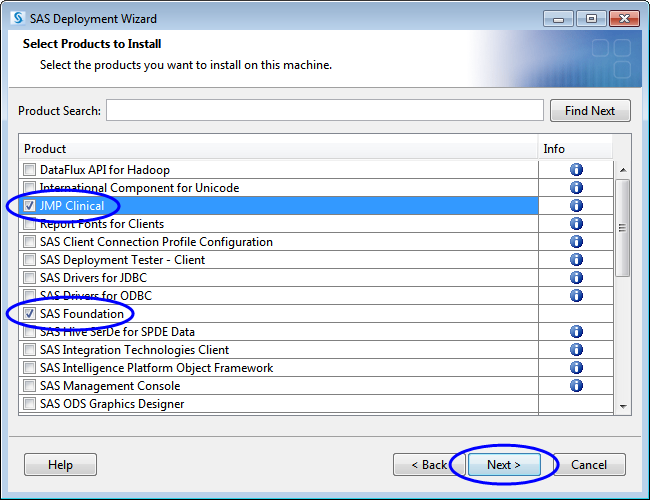
Select Install SAS Software and click .
|
|
|
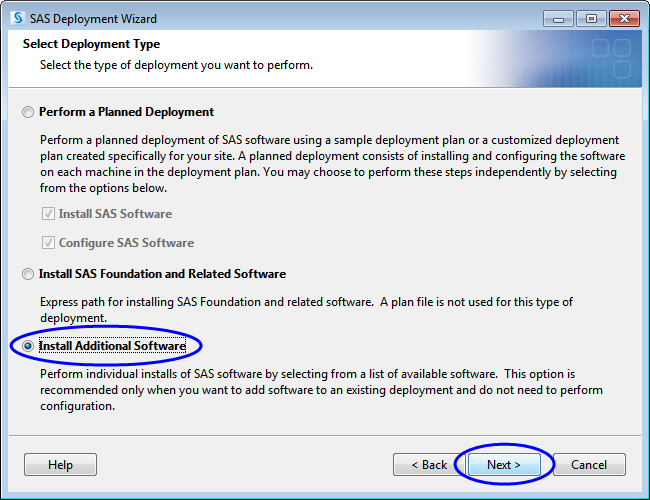
Select Install Additional Software and click .
|
|
|
|
|
Click on the next few s.
|

|
|
Click .
|
|
|
Click on the next few s.
|
|
|
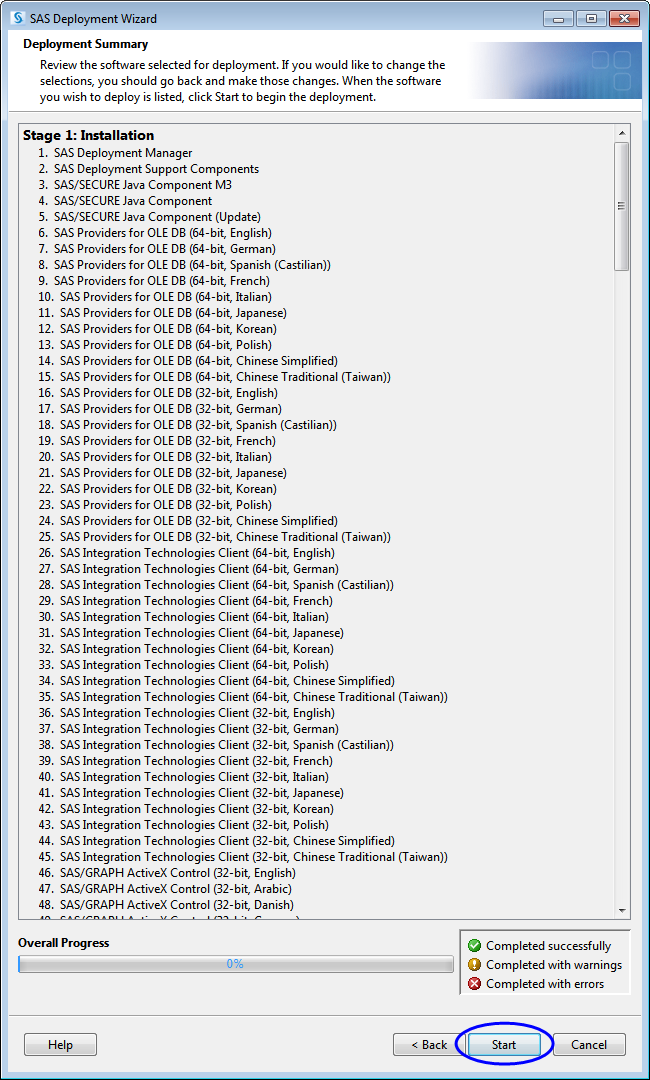
Review the Deployment Summary (shown below) and click .
|
|
|
When all components have been successfully installed, click and/or in this and all subsequent s to complete and exit the installer.
|
|
|
Reopen JMP Clinical. Options for selecting English, Japanese, and Chinese should now be available in the Switch to Language drop-down menu.
|
Data used in JMP Clinical must comply with local CDISC standards for variables and values. Certain values have been hardcoded in JMP Clinical software and must be specified exactly as listed below. The following table lists the English specification for these values and their equivalents in additional languages supported by JMP Clinical software:
|
|
|
||||
|
|
|
||||
|
|
|
||||
|
|
|
||||
|
|
|
||||
|
|
|
||||
|
|
|
||||
|
|
|
||||
|
|
|
||||
|
|
|
||||
|
|
|
||||
|
|
|
||||
|
|
|
||||
|
|
|
||||
|
|
|
||||
|
value for AESER in
|
|
|
|||
|
value for AESER in
|
|
|
|||
|
|
|
||||
|
|
|
||||
|
|
|
||||
|
|
|