The Basic Exon/Alternative Splicing Workflow process builds and runs a workflow using an exon expression data set. This automated process uses one or more quality control processes and normalization methods, followed by ANOVA, to perform a basic expression analysis. It can be used to test for alternative splicing.
|
•
|
An Input Data Set that contains all of the numeric data to be analyzed. An example is partially shown below. It has 22 columns and 74256 rows. Note that this is a tall data set; each probesets (representing an exon) corresponds to one row, whereas each column corresponds to a separate array.
|

|
•
|
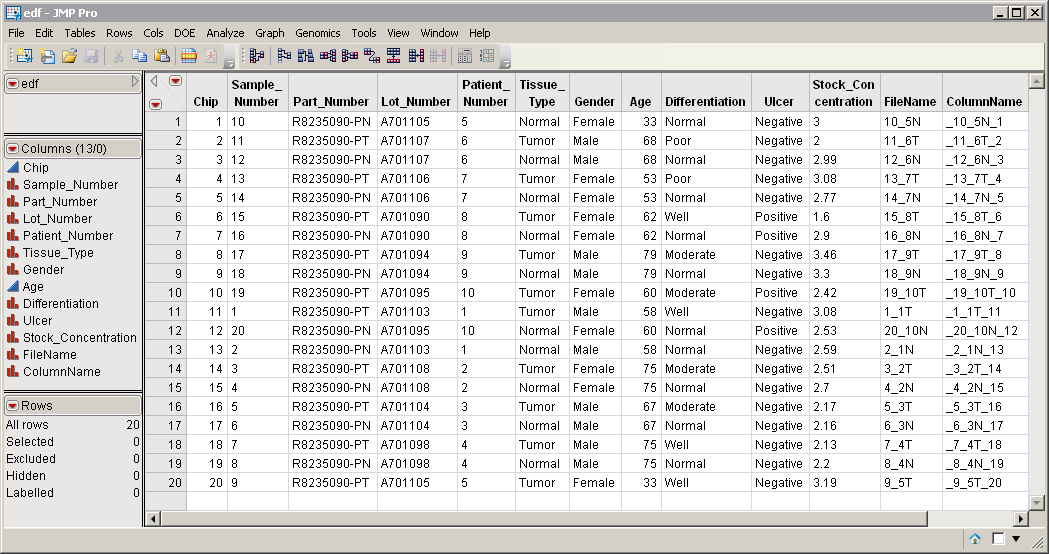
An Experimental Design Data Set (EDDS). This data set tells how the experiment was performed, providing information about the columns in the input data set. The edf.sas7bdat EDDS serves as an example, and is shown below. Note that one column in the EDDS must be named ColumnName and the values contained in this column must exactly match the column names in the input data set.
|
Three data sets are optional:
|
•
|
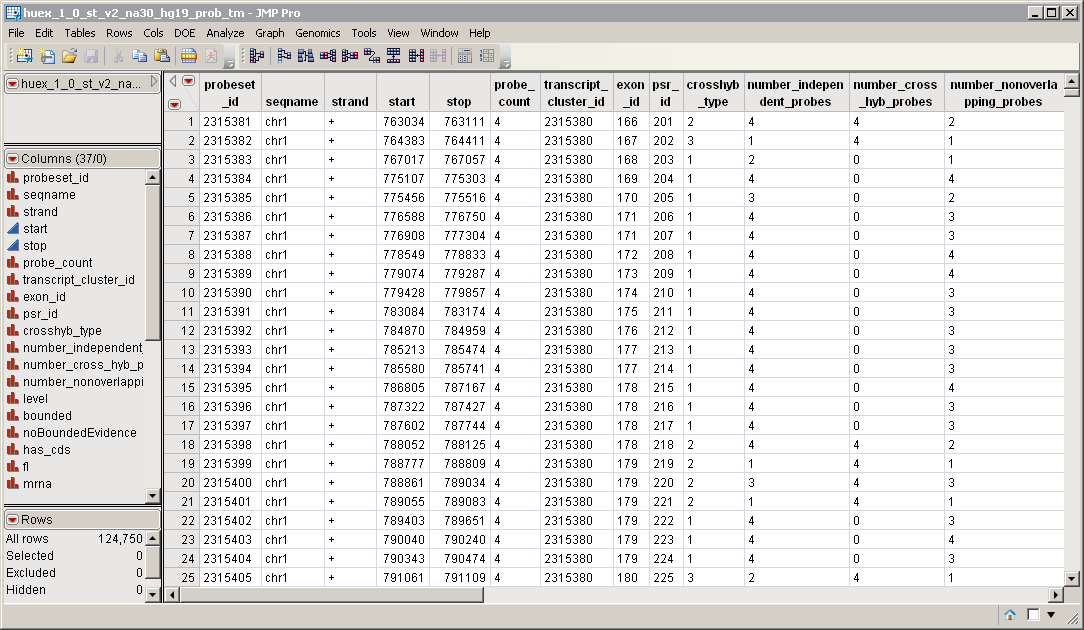
An exon Annotation Data Set. This data set contains information such as gene identity or chromosomal location, for each of the exons. The huex_1_0_st_v2_na30_hg19_prob_tm.sas7bdat annotation data set serves as an example, and is illustrated below.
|
|
•
|
A transcript Annotation Data Set. This data set contains information such as gene identity or chromosomal location, for each of the transcripts. The huex_1_0_st_v2_na30_hg19_tran_tm.sas7bdat data set serves as an example, and is illustrated below.
|
|
•
|
A tracks settings file. This file is a SAS settings (.sas) file, generated from a text file using the Track Gene Text process. This settings file defines a track for a set of genes, and is used to embellish the p-values plot with depictions of genes.
|
All of the data sets shown above are included in the Sample Data\Microarray\Affymetrix Exon directory included with JMP Genomics.
For detailed information about the files and data sets used or created by JMP Life Sciences software, see Files and Data Sets.
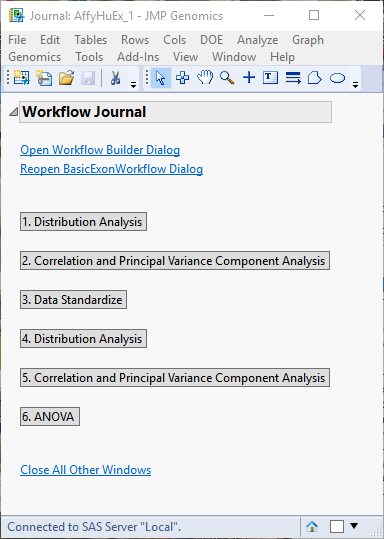
When you click , the Basic Exon/Alternative Splicing Workflow process begins by opening the Workflow Builder. The Workflow Builder builds settings files for each process containing the information from the data sets and parameters specified in the Basic Exon/Alternative Splicing Workflow dialog. Once the setting files are generated and saved, the individual processes in the workflow are sequentially opened, populated, and run. The results of the processes are saved in the specified output folder. Finally, a JMP journal, providing links to the workflow dialog and the results of each process, is generated.
|
|
Click .
|
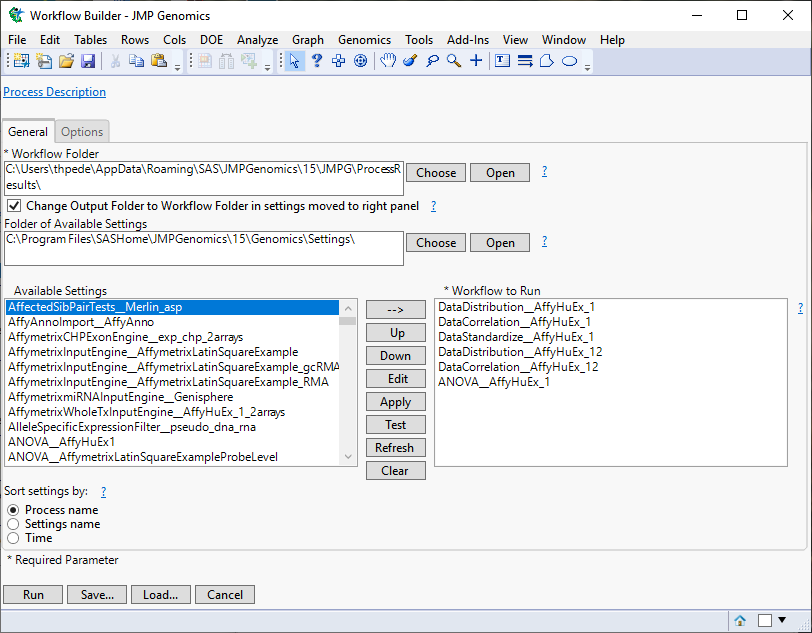
The Workflow Builder dialog shows the settings for each of the processes in the workflow. You can select and edit individual settings to adjust your analysis.
|
|
Clicking each of the buttons on the journal brings up the output of each of the processes. This enables you to examine each set of output so that adjustments can be made to the individual settings, as needed. For your convenience, links to the default Basic Exon/Alternative Splicing Workflow processes are given below.
|
|
•
|