|
•
|
Save as Interactive HTML saves a single, interactive JMP report as a web page.
|
|
•
|
Publish to File saves multiple, interactive JMP reports as web pages.
|
|
•
|
Publish to JMP Public saves interactive JMP reports to a public collaboration website, https://public.jmp.com/.
|
Figure 10.2 Brushing Data in Interactive HTML
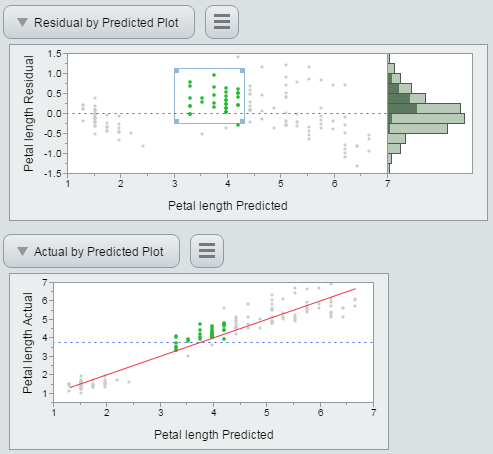
When you save reports as interactive HTML in JMP, your data are embedded in the HTML. The content is unencrypted, because web browsers cannot read encrypted data. To avoid sharing sensitive data, save your results as a non-interactive web page. (Select File > Save As > HTML File on Windows, or File > Export > HTML on Macintosh.)
|
2.
|
Select File > Save As and select Interactive HTML with Data from the Save as type list. On Macintosh, select File > Export > Interactive HTML with Data.
|
|
3.
|
(Optional) To avoid opening the HTML file in the default browser after saving, deselect Open the file after saving.
|
For information about exploring interactive HTML output, visit https://www.jmp.com/support/help/InteractiveHTML/14/ShareJMPReports.shtml.
|
1.
|
In JMP, open a data table. For this example, select Help > Sample Data Library and open SATByYear.jmp.
|
|
2.
|
|
3.
|
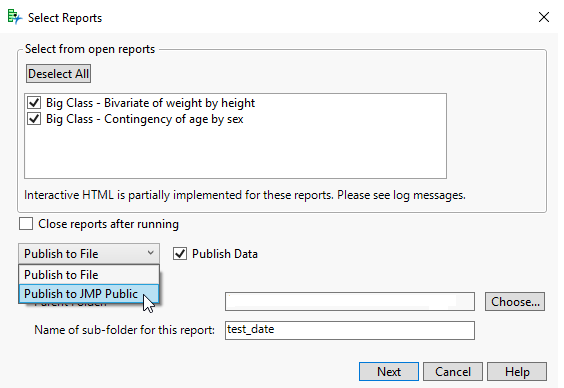
From any JMP window, select File > Publish.
|
Figure 10.3 Selecting Reports

|
5.
|
In the drop-down list, make sure Publish to File is selected.
|
|
6.
|
To make the graphs interactive, select Publish Data.
|
|
8.
|
Click Next.
|
|
9.
|
Figure 10.4 Customizing the Web Report

|
–
|
|
–
|
To add back a report after deleting it, click Restore Reports. (This button appears only if you have deleted a report.)
|
|
12.
|
Click Build Report.
|
Figure 10.5 Web Report

|
13.
|
Click on one of the thumbnails to open the report. See https://www.jmp.com/support/help/InteractiveHTML/14/ShareJMPReports.shtml for details about working with interactive reports.
|
Enables you to specify a CSS file to format the web page. The CSS file is copied into a subdirectory called _css. The link to the CSS file is relative so that you can send the report and support files to another user and maintain the CSS formatting.
|
1.
|
To register for JMP Public, go to https://public.jmp.com/.
|
|
2.
|
At the top right, click Sign In.
|
|
a.
|
|
5.
|
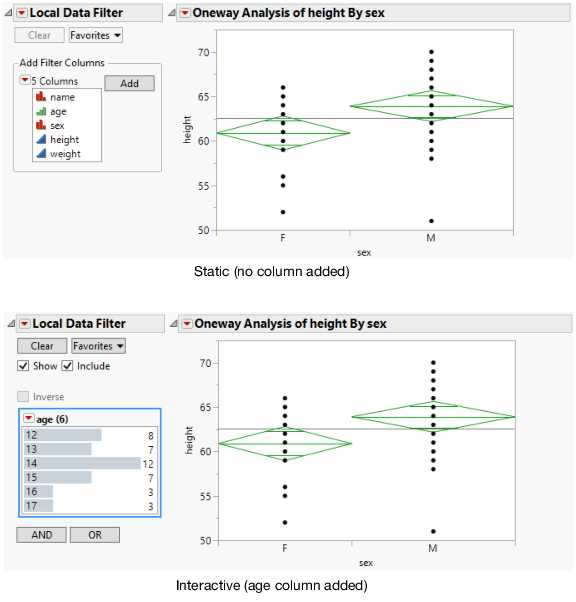
You will not be able to add filter columns after you publish the report. It will simply be static instead of interactive. See Figure 10.6.
Figure 10.6 Static and Interactive Local Data Filters
|
3.
|
Figure 10.7 Select Publish to JMP Public
|
5.
|
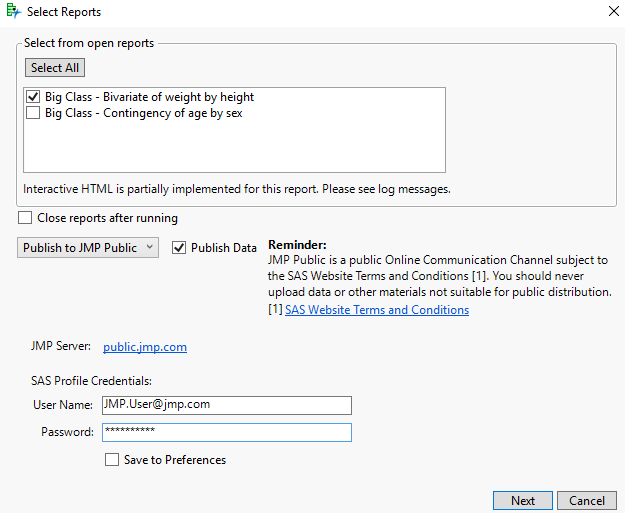
From the drop-down list, select Publish to JMP Public.
|
|
6.
|
(Optional) To publish the data tables associated with the reports and make the reports interactive, click Publish Data. If you deselect this, data are not embedded, and the graphs are static.
|
|
7.
|
Figure 10.8 Enter Credentials
|
8.
|
(Optional) To remember your credentials, check Save to Preferences.
|
|
9.
|
Click Next.
|
Figure 10.9 Configure the Web Report
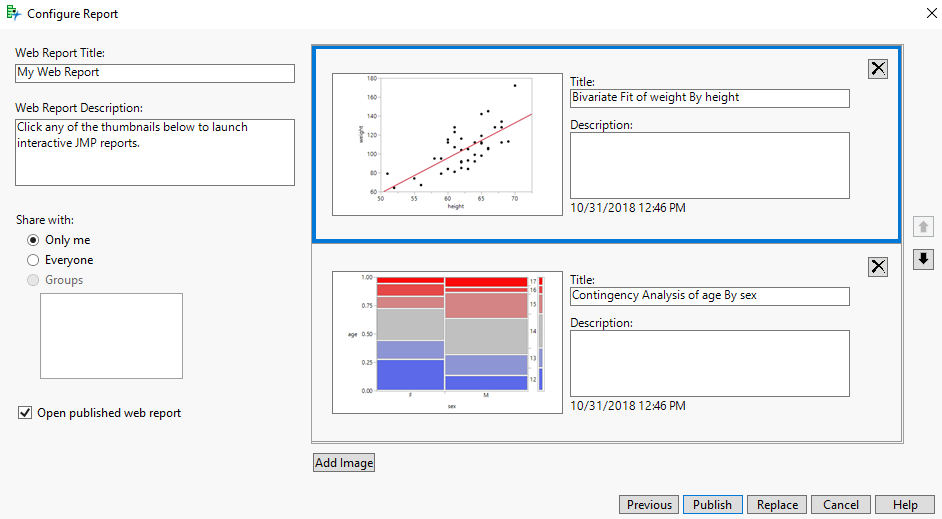
 on the right.
 .
.|
12.
|
(Optional) To open the post after creating it, check Open published web report.
|
|
13.
|
|
–
|
Only Me means your report is visible to you only. An orange lock icon appears on the report in JMP Public to indicate that it is private.
|
Note: If you choose Only Me, you are prompted to log in to confirm your identity before the post opens.
|
14.
|
(Optional, multiple reports only) To add images, click Add Image. You can also enter a title and description.
|
|
15.
|
Click Publish. Or, if you are updating an existing post, click Replace. When replacing a post, make sure that the titles match.
|
|
16.
|
|
17.
|
Click OK to dismiss the informative window that says your reports are published.
|
The post opens in your default browser. For help using the web interface, see https://www.jmp.com/support/help/JMPPublic/14/JMPPublicHelp.shtml.