To start a Taguchi design, select DOE >Taguchi Arrays, or click the Taguchi Arrays button on the JMP Starter DOE page. Then, follow the steps below:
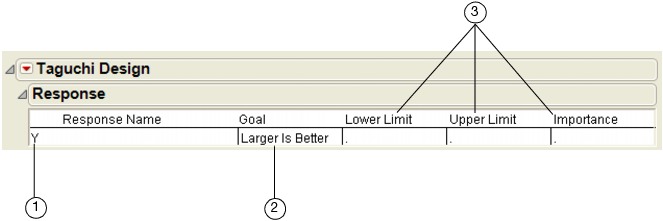
The Responses panel has a single default response. The steps for setting up the details of this response are outlined in Setting Up the Response. For information on importance weights and lower and upper limits, see Understanding Importance Weights in Screening Designs.
|
2.
|
|
1.
|
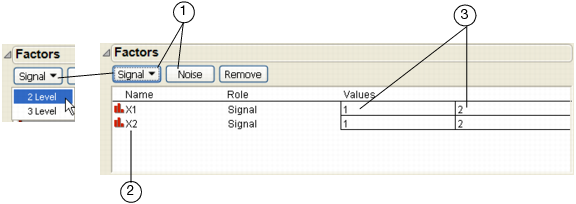
When you finish adding factors, click Continue.
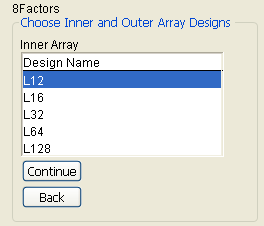
Your choice for inner and outer arrays depends on the number and type of factors you have. Selecting a Design for Eight Signal Factors shows the available inner array choices when you have eight signal factors. If you also have noise factors, choices include designs for the outer array. To follow along, enter eight two-level Signal factors and click Continue. Then highlight the design you want and again click Continue. This example uses the L12 design.
If you did not specify a noise factor, after you click Continue, a dialog appears that asks you to specify how many times you want to perform each inner array run. Specify two (2) for this example.
After you select a design type, the Coded Design (Coding for Eight Factor L12 Design) is shown below the Factors panel.
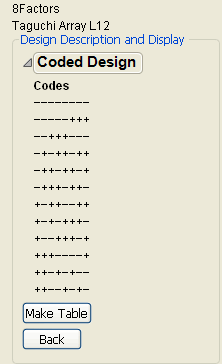
The Coded Design shows the pattern of high and low values for the factors in each run. For more details on the coded design, see Understanding Design Codes in Screening Designs.
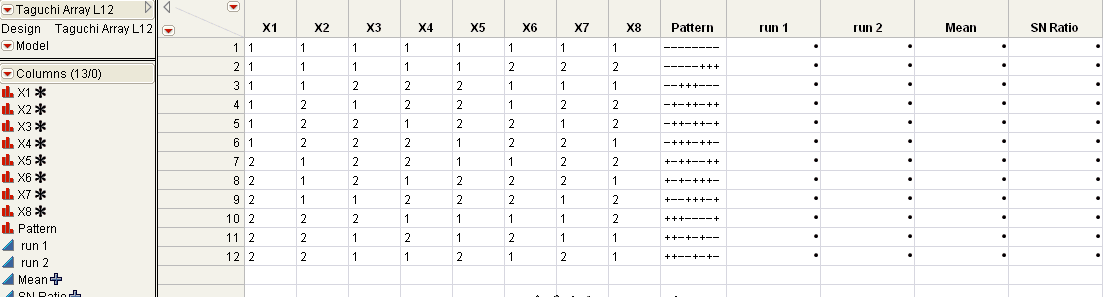
When you click Make Table, a table similar to that shown in Taguchi Design Table for Eight Factor L12 Design appears. In the data table, each row represents a run. In the values for the Pattern variable, plus signs designate high levels and minus signs represent low levels.