Importing VCF Files
Variant Call Format (VCF) files are specialized tab-delimited text files that are used to store variant calls for markers across a genome for numerous individuals, or samples, from a study population. These files contain standardized headers and columns. An example VCF file, obtained from the Maize Diversity Project and downloaded from here, containing Maize genotypes, and viewed within a text editor, is shown below:
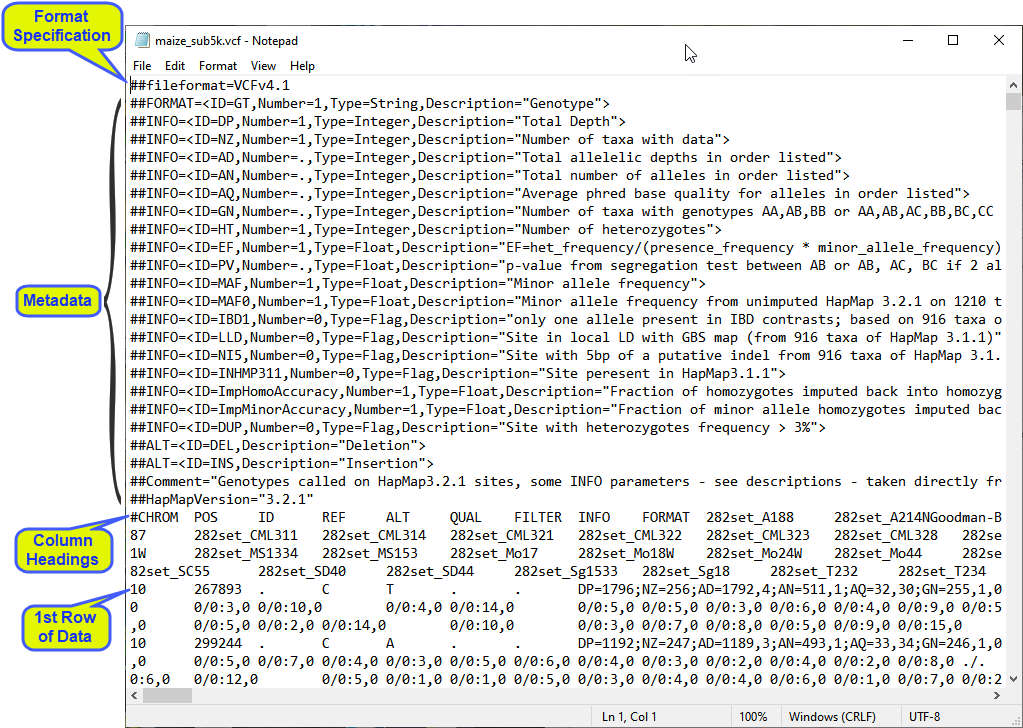
The first line specifies that the file format is a VCF v4.1 file. When JMP Pro opens a text file, it looks for this line and when it finds it, the software knows it is a VCF file and implements a specific protocol for importing it into a JMP table.
Importing One File into JMP Pro
In this example, we import the maize_sub5k.vcf file shown above.
| 8 | Select File > Open. An Open Data File window opens to the last location used. |
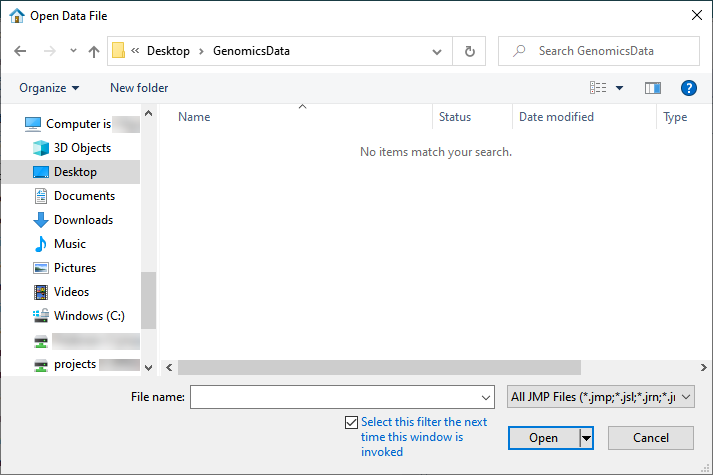
| 8 | Navigate to the location of the VCF file and use the drop-down menu (shown below) to select Genomics Text Files (*.txt; *.tsv; *.csv; *.bed; *.gff; *.gff3; *.gtf; *.mxt; *.vcf). |

The options in the window change.
| 8 | Select the desired file. |
| 8 | Check the Open as Data (Using Preview) radio button. |
| 8 | Click . |
The Preview window is shown below:
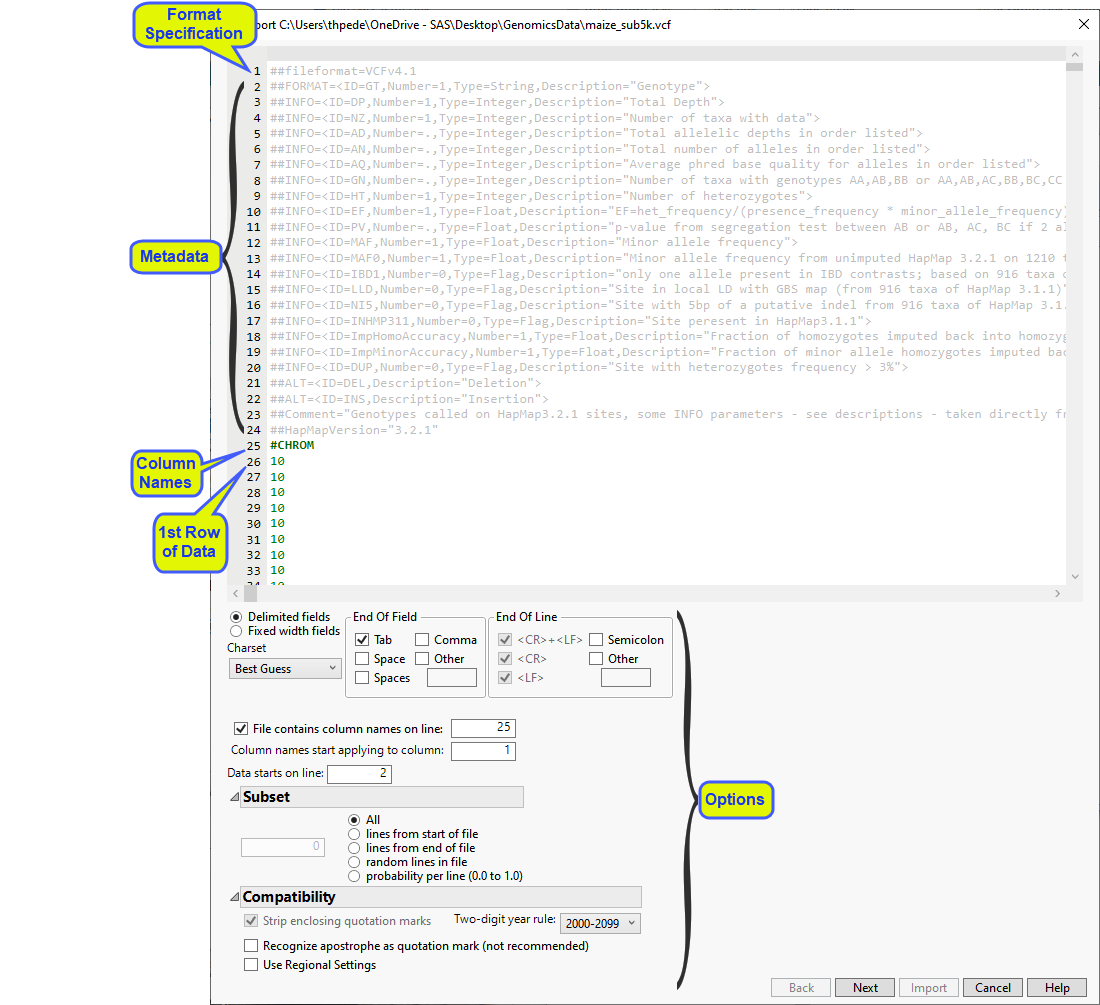
The preview enables you to visually inspect your data. You can identify the rows containing metadata and column names. Note that for a VCF file, this is identified automatically. Scroll through the table to determine the rows and columns containing the data. In this example, all of the content to be imported into the JMP table is shown in black. This includes the row of column names (row 25)and all of the data starting with row 26). Vertical bars in the table delimit the data included in each column.
Examine the preview. Content not contained in the column name and data rows are grayed out and are not included in the JMP table.
The wizard also presents options for specifying features of and subsetting the data. Refer to Options in the JMP Text Import Window for more information about these options. In most cases, you will not need to change default settings for these options. However, you might need to specify the rows containing column names and the start of the data. (Note: The line the data starts on refers to the row actually imported.) Additionally, it might be useful to subset very large data sets into multiple JMP tables that can be joined later.
Once you have specified the column name and data rows and any sub-setting options, click .
If everything is satisfactory, click to generate the JMP table.
Two tables are generated by the import process: the maize_sub5k.jmp table and the maize_sub5k_wide.jmp table.
Before we continue, let us discuss how genomic data should be structured for analysis in JMP Pro. Most of the processes in JMP Pro assume that the input table has a particular data structure.
First, JMP PRO distinguishes between tall and wide data sets. A tall data table![]() A data table in which variables in rows and samples are in the columns has samples as columns and molecular entity (for example, markers, genes, clones, proteins, or metabolites) as rows, whereas a wide data table
A data table in which variables in rows and samples are in the columns has samples as columns and molecular entity (for example, markers, genes, clones, proteins, or metabolites) as rows, whereas a wide data table![]() A data table in which variables are columns and samples are rows. is the transpose of the tall, having the samples as rows and molecular entities as columns.
A data table in which variables are columns and samples are rows. is the transpose of the tall, having the samples as rows and molecular entities as columns.
When specifying the input data set for a process, it is important to know the required form. Most genomic analyses in JMP Pro require a wide data table. The Transpose platform under the Tables menu enables you to transform your data tables between tall and wide forms.
Second, Marker data must be encoded in the one-column, numerical, genotypic format. Typically, in this format, diploid individuals homozygous for the least common, or minor allele, are represented in the table by a "2", whereas the heterozygotes are represented by a "1". Homozygotes for the most common allele are represented by a "0". This is not a common representation for genotypes. More typically, genotypes are represented by characters, either letters or numbers, often with both alleles represented with a delimiter. This format is not recognized by JMP Pro and must be recoded to the numerical form before we can proceed with the analysis.
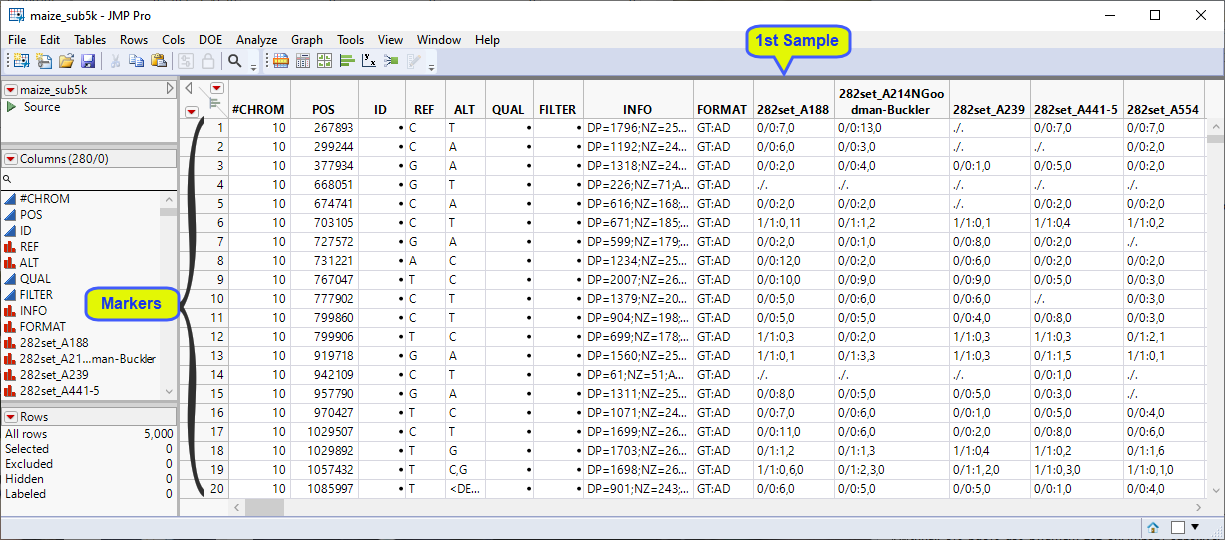
Examine the maize_sub5k.jmp table above. This table has essentially the same structure as the VCF file that we started with. Markers 1 through 5000 make up the rows. The individual maize plant samples make up the columns, starting at column 10. This JMP table is a tall data table and must be transposed to a wide format. Additionally, genotypes here are presented in character format. When the marker allele is the same as the reference allele at that position, it is represented as a "0". Alternative alleles are represented as "1", regardless of their actual identity. When the genotype is missing, alleles are represented with a ".". The diploid alleles at the locus are separated by a delimiter. In addition to the actual genotypes, the data columns contain additional, extraneous characters that must be removed. The genotypes must be recoded before we can proceed further.
However, the import process generated a second JMP table, the maize_sub5k_wide.jmp table, shown below:
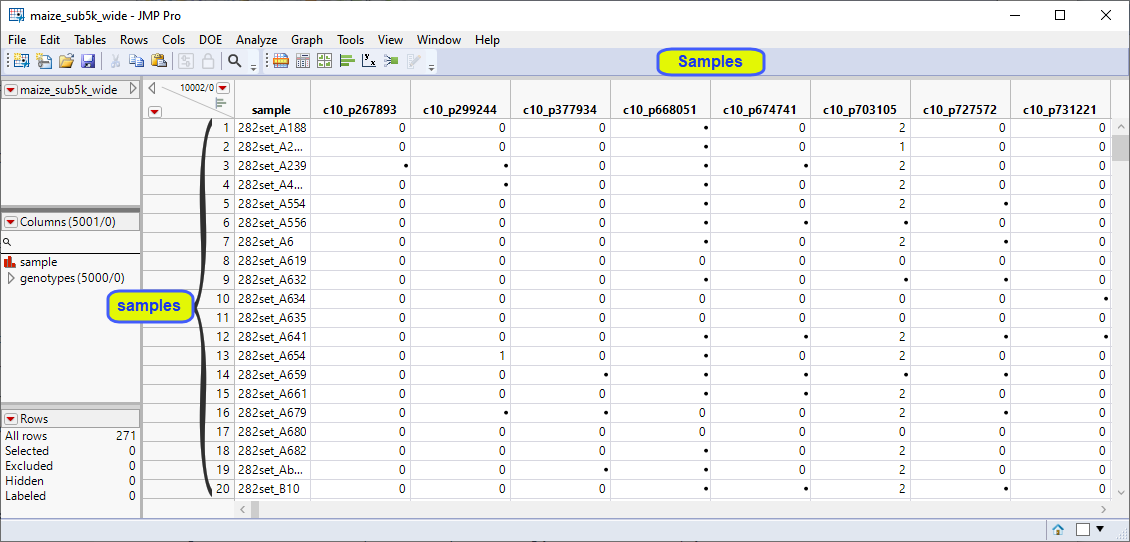
The maize_sub5k_wide.jmp table is a transpose of the original VCF file. This is a wide data table. Markers 1 through 5000 make up the columns. The individual maize plant samples make up the rows. Furthermore, the genotypes are coded in the numeric format. Individuals homozygous for the least common, or minor allele, are represented in the table by a "2", whereas the heterozygotes are represented by a "1". Homozygotes for the most common allele are represented by a "0". This table is ready for analysis using the Marker Statistics and other JMP platforms.
Importing Multiple VCF Files into JMP PRO
It is often the case that Genetic data consists of multiple VCF files in which, unlike the example shown above, the data for each sample is contained within a separate VCF file. In this case, all of the files must be imported and joined into one tall and one wide data sets
In this example, we have three small VCF files and we use JMPs Multiple File Importer to import and join the files. Each file contains data from a single individual. The three files have the same format: there are 265 rows of metadata, column names are listed in row 266 and the data begins on row 267.
| 8 | Select File > Import Multiple Files.... A Multiple File Import window opens. |
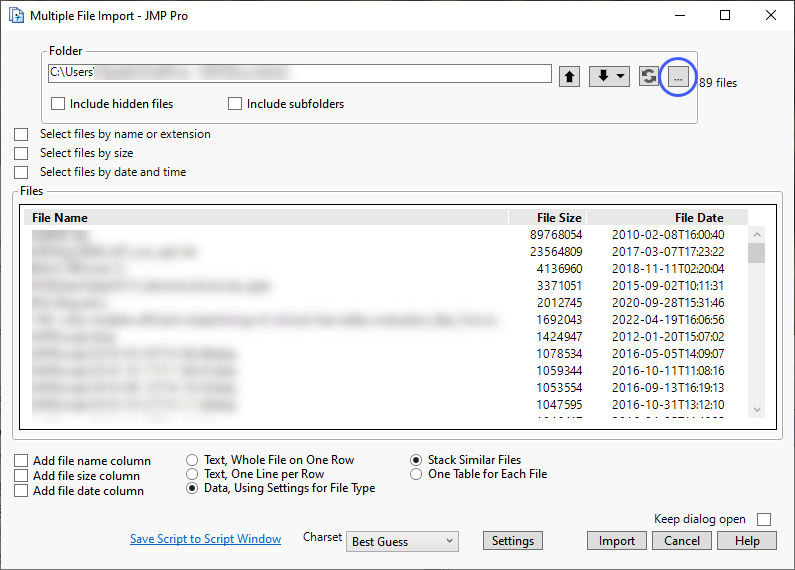
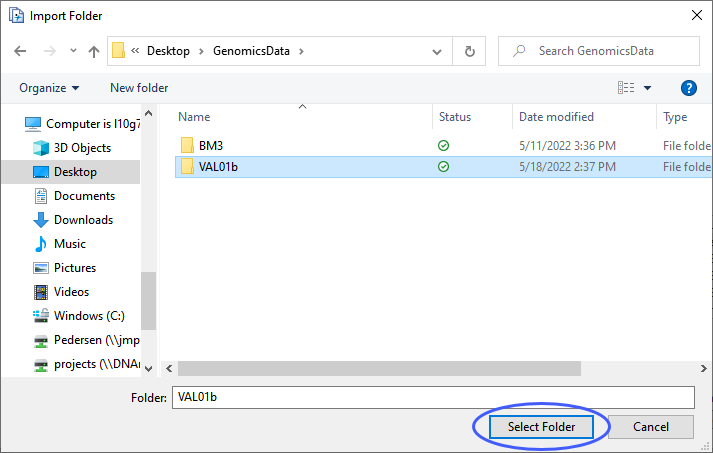
| 8 | Click to open an Import Folder window. Navigate to the folder containing the files to be imported and click . |
The Multiple File Import window shows the files to be imported.
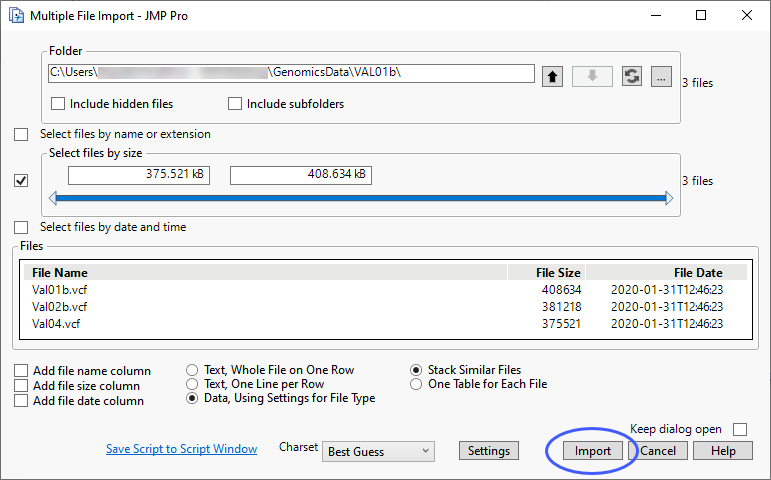
| 8 | Click to import the files. |
As shown above for importing a single VCF file, two tables are generated by the import process: the Val01.jmp table and the Val01_wide.jmp table. Both tables contain the data from the three individual VCF files joined into a single table.
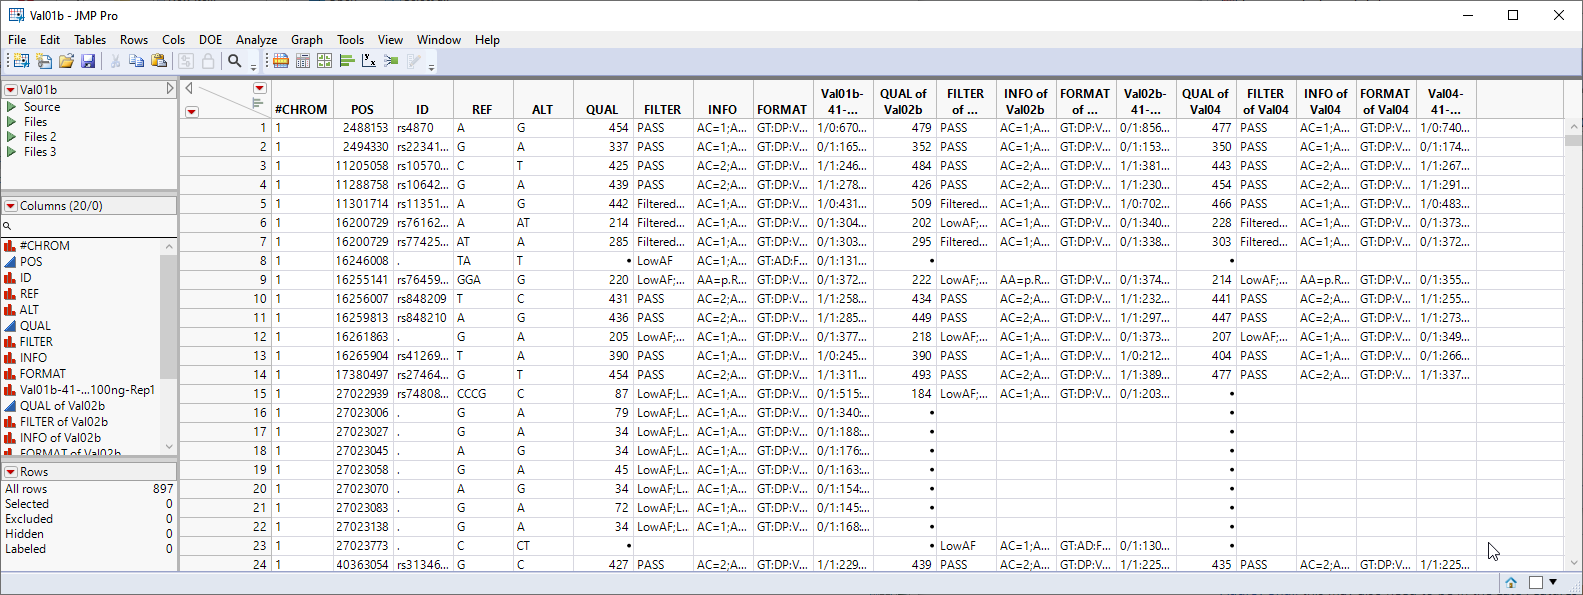
This table has essentially the same structure as the VCF file that we started with. Markers 1 through 897 make up the rows. The individual samples make up the columns, starting at column 10. This JMP table is a tall data table and must be transposed to a wide format. Additionally, genotypes here are presented in character format. In addition to the actual genotypes, the data columns contain additional, extraneous characters that must be removed. The genotypes must be recoded before we can proceed further.
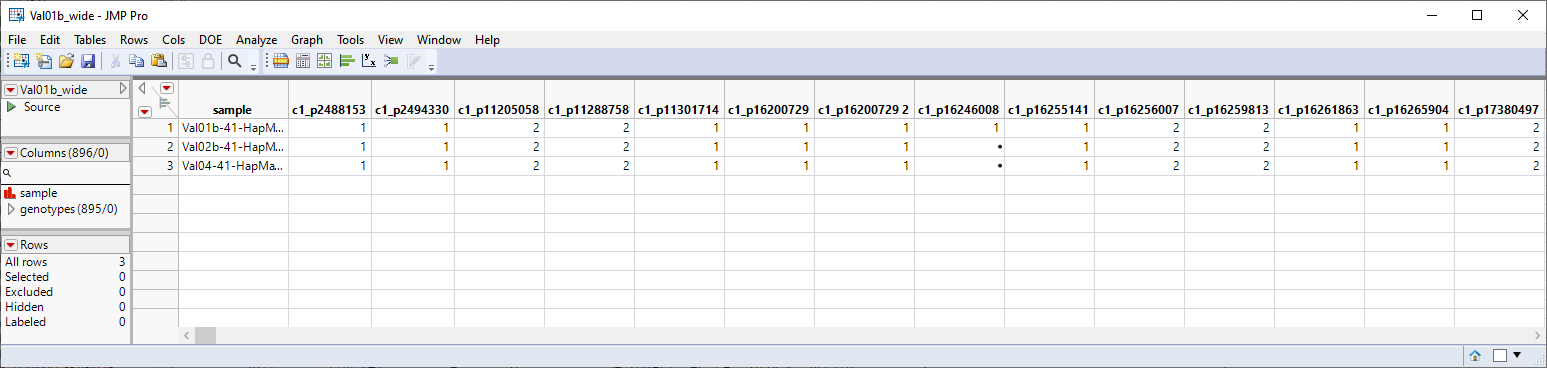
The Val01b_wide.jmp table is a transpose of the original VCF files. This is a wide data table. Markers 1 through 897 make up the columns. The individual samples make up the rows. Furthermore, the genotypes are coded in the numeric format. Individuals homozygous for the least common, or minor allele, are represented in the table by a "2", whereas the heterozygotes are represented by a "1". Homozygotes for the most common allele are represented by a "0". This table is ready for analysis using the Marker Statistics and other JMP platforms.
You should make sure that all of the variables are coded using the same allelic format. Refer to Verifying Marker Encoding for more information.