View Domains
This feature enables you to view any selected domain data set from any of your studies. Simply open the Studies tab, highlight a study from your Studies list, and click  to open the View Domains window. Select the domain you want to examine from the drop down list and click OK. Study domains are displayed as JMP tables.
This feature is especially useful when you are working with a study containing one or more snapshots. It allows you to compare the current and previous snapshots to see changed records, view new records or modified records, flag duplicate records in both the current and previous snapshots, and identify dropped records.
Note: The JMP tables remain open until explicitly closed, allowing multiple domains to be viewed at the same time. This also enables users to view domains across multiple studies.
Example
This example uses the Nic_ABBR sample data set shipped with JMP Clinical. This data is located with your Sample Data (typically C:\ProgramData\SAS\JMPClinical\xx\Clinical\Sample Data\Nicardipine for Windows machines and /Library/Application Support/JMP/xx/Clinical/Sample Data for MACs, where xx indicates your version of JMP Clinical). If you haven't added this study, use the Add Study... procedure to add the study. Once the Nic_ABBR study is added and selected, you must update it using the Update Study with New Snapshot... feature and the standard Nicardipine study as the snapshot.
| 8 | Open the Studies tab and highlight the Nic_ABBR study. Click to open the View Domains window. |
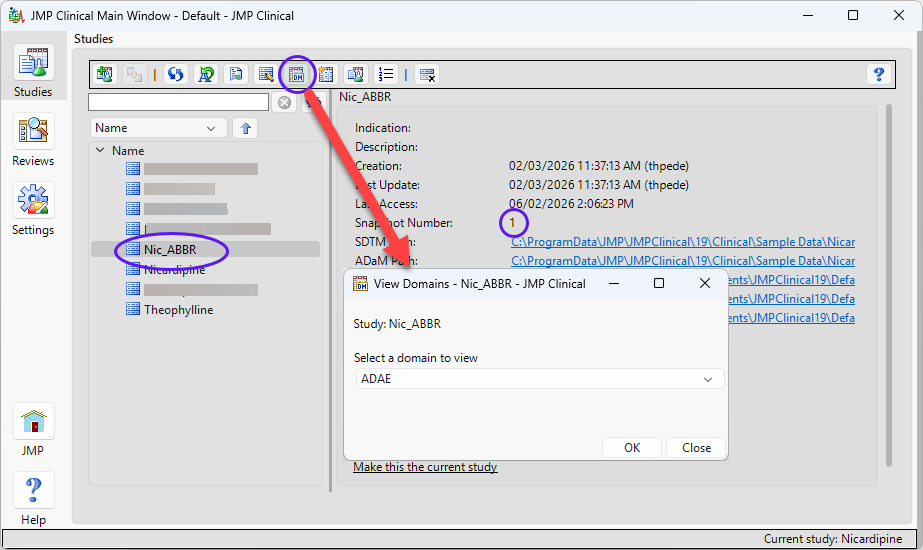
| 8 | Select the DM domain from the drop down menu to view the DM domain as a JMP table, as shown below. |
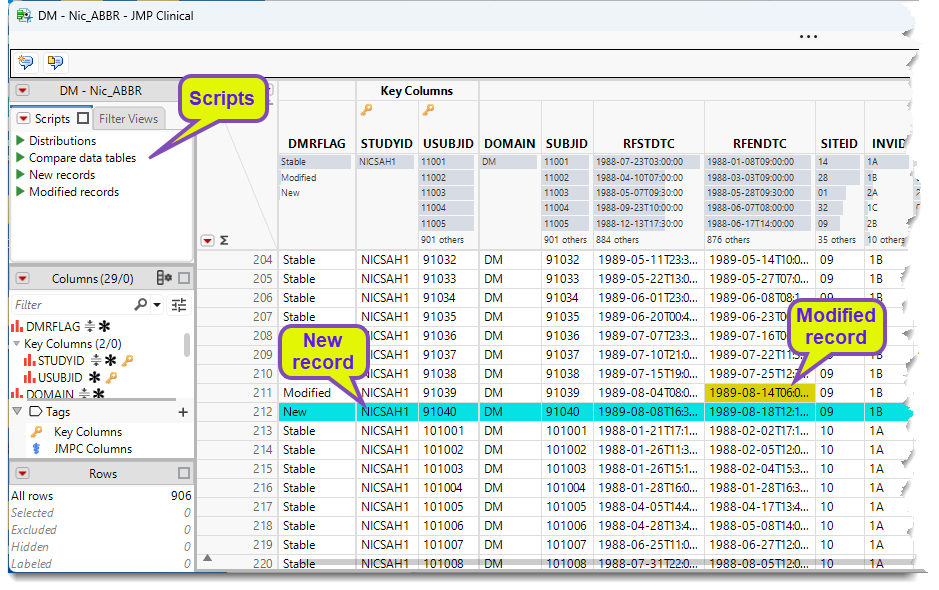
In snapshot studies, new records are highlighted in turquoise, modified records are highlighted in chartreuse, dropped records are highlighted in red, and duplicate records are highlighted in blue.
The View Domains window remains open after you select a domain. This allows you to select multiple domains consecutively.
Note the key columns identified in the table. The values in these columns enable JMP Clinical to identify subject specific records. You can modify the key columns via the system.clinical.preferences file (see JMP Clinical Key Variables). If you do make changes, you should use the same key columns to maintain consistency. Otherwise, comparing an old snapshot with a new one that uses different key columns can make it difficult to perform an accurate comparison.
Scripts
The table contains a number of scripts that allow you to drill down into the snapshots to see how the data has changed from one snapshot to another. To run the scripts, simply click  next to each script to open a subset table containing the records matching the criteria.
Distributions
The ADSL/DM domain includes an additional script called Distributions. This script is available regardless of whether the study is a snapshot study. When users run the Distributions script, it displays the distribution of subjects across key demographic variables (such as sex, race, ethnicity, and age) as well as treatment variables.
Compare data tables
This script generates plots and tables that highlight all the differences between the previous and current snapshots.
New Record
This script generates a subset table containing just the records that are new in the current snapshot.
Modified Records
This script generates a subset table showing how each record appeared in the previous snapshot and how it appears in the current snapshot. The values of the Snapshot Number column will identify the prior and current versions of the record.
Dropped Records
This script generates a subset table that contains just the records in the previous snapshot that have been dropped from the current snapshot.
Previous Duplicates
This script generates a subset table that contains just the records in the previous snapshot that were duplicates but are not duplicated in the current snapshot, as determined by the values of the key variables.
Current Duplicates
This script generates a subset table that contains just the records in the current snapshot that were duplicates but are not duplicated in the previous snapshot, as determined by the values of the key variables.
Filter Views
Filter Views allow users to filter the current data on Modified, New, and Stable records.
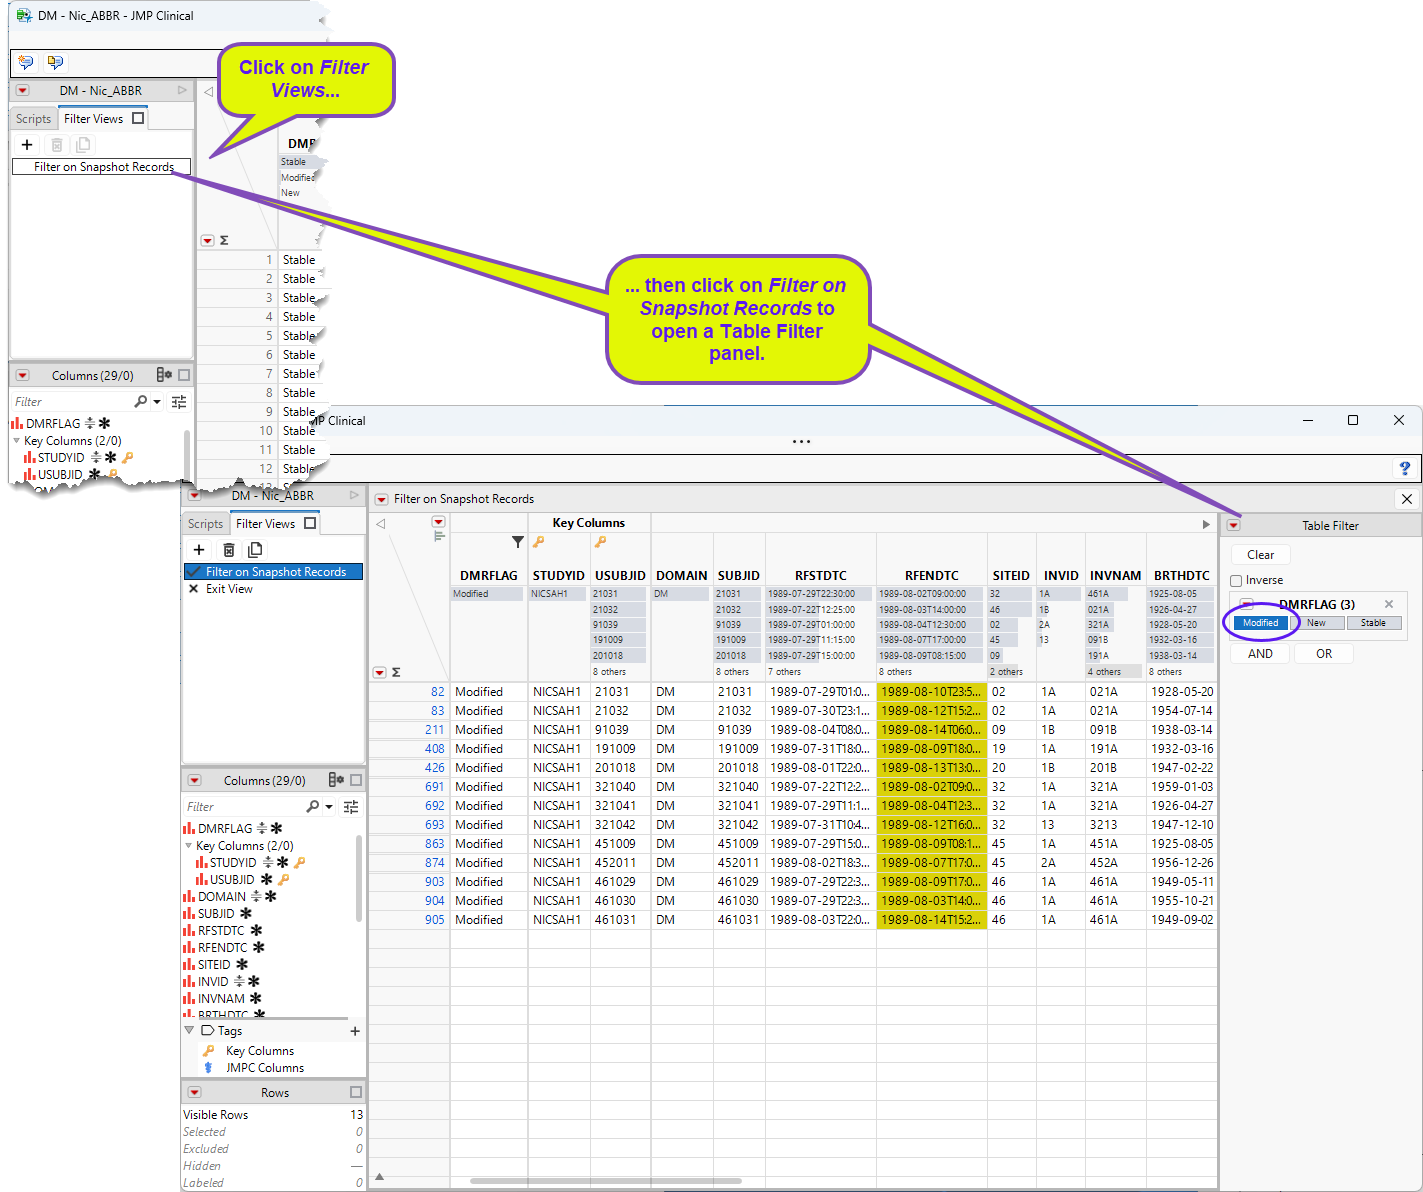
By default, the Modified records are selected (circled) and displayed. Click New or Stable to view those records.