Select Tables from a SQL Database
After connecting to the SQL database, select the tables that you want to query. Either select a primary table or join several tables to query them all.
By default, JMP attempts to join tables based on key relationships that are assigned in the tables.
• A primary key identifies a column that uniquely describes the data (for example, a customer ID number). All rows from the primary table are included in your query.
• A foreign key in a secondary table matches the primary key in one of the joined tables. Only matching rows from the secondary table are included in your query.
If there are no keys, data are matched by column name, which joins the two tables. By default, only matching rows from the secondary tables are included in the query.
This example shows how to join multiple tables. However, you can also build a query using a single table. In this case, joining is not necessary.
Note: The Query Builder examples are based on a database that is not installed with JMP.
1. Select File > New > Database Query, connect to the database, and select the SQBTest schema. See Connect to a Database.
2. Select the schema from the Schemas - Tables list.
If you also select a table, that table will be the primary table after you click Next.
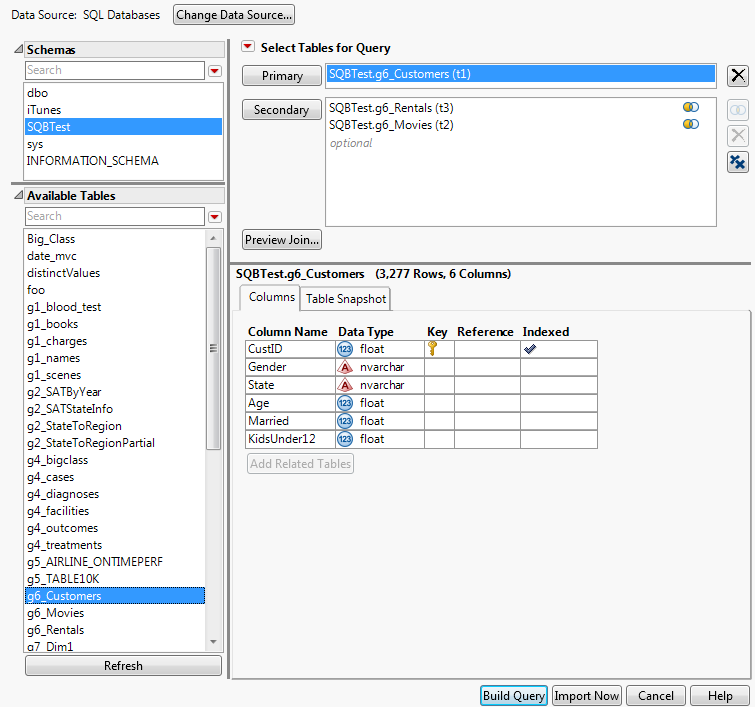
3. In the Select Tables for Query window, select g6_Customers from the Available Tables list, and then click Primary.
The Columns tab shows that CustID is the primary key. The data is indexed, which speeds up the query.
4. Select g6_Movies and g6_Rentals from the Available Tables list, and then click Secondary.
The Left Join icon  indicates that the tables were automatically joined (Figure 3.35). CustID is the primary key in g6_Customers and matches a foreign key in one of the other tables.
Tip: After you add a primary or secondary table, click Add Related Tables to add tables that have matching columns. The button is unavailable when no related tables are found or when a primary or secondary table is not selected.
Figure 3.35 shows the completed window.
Figure 3.35 Selecting Primary and Secondary Tables
Tip: To find the schema in a long list, enter the name in the search box above the schemas. You can also search for tables above the list of tables. The red triangle menu provides options for matching case and searching with regular expressions.
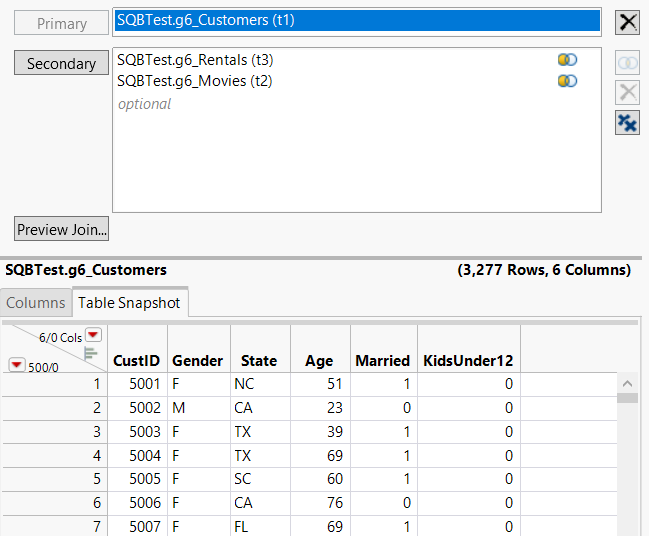
5. Click the Table Snapshot tab for each table to preview the data.
Figure 3.36 Table Snapshot Tab
6. Below the primary and secondary tables, click Preview Join to see a preview of the table that was created from the specified joins.
Tips:
• The  icon next to a secondary table indicates that the table is not joined in the query. Click the Edit Join button
  to specify the columns to join. If you cannot find columns to join, click the Remove button
  to remove the table. See Edit the Conditions for Joining Tables.
• On the Columns tab, the Key column might show multiple keys; some columns can be both primary and foreign keys. A unique key icon does not appear next to primary keys, because all primary keys are unique.
• On the Columns tab, the Reference is specified for foreign keys that match primary keys in another schema. The reference is the name of the schema and column.
• Click Change Data Source to query a different schema or database.
• To join data from different sources (for example, a database and Microsoft Excel), use Query Builder to import the database data into a data table; import the Excel data into a data table; use JMP Query Builder in the Tables menu to query and join the tables.
• When you import a table that contains a primary key, the Link ID column property is added to the column in the data table. The column property enables you to virtually join data tables. See Virtually Join Data Tables in the Reshape Data section.
Edit the Conditions for Joining Tables
In the Select Tables for Query red triangle menu, Auto join Database Tables is initially selected. JMP automatically joins database tables based on key relationships or matching column names.
If there are no keys, or when column names do not match, click Edit Join to specify the columns to join.
Note: The Query Builder examples are based on a database that is not installed with JMP.
To edit the conditions for joining tables
1. Select File > New > Database Query, connect to the database, and select the SQBTest schema. See Connect to a Database.
2. In the Select Tables for Query window, select g1_books as the Primary table and g1_charges as the Secondary table.
The icon next to the secondary table indicates that the table is not joined in the query.
3. Select g1_charges in the Secondary table pane and click Edit Join .
The Add Condition window appears.
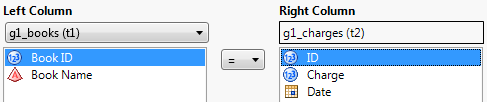
4. In the Left Column list, select g1_books.
5. Select Book ID from the Left Column box.
6. Select ID from the Right Column box.
7. Make sure that the equal sign is selected between the two boxes.
Figure 3.37 The Add Condition Window
8. Click Next.
The Edit Join window shows that non-matching rows from g1_books will be included in the data table. Rows that are only in g1_charges will be omitted.
To do a full join and import all rows, you would select Include non-matching rows from g1_charges. If only one of the non-matching options is available, the database does not support full joins.
9. Click OK.
Note: The OK button is unavailable until all of the secondary tables are joined.
To prevent tables from joining automatically
• Deselect Auto join Database Tables from the Select Tables for Query red triangle menu above the primary table.
• If you frequently query large databases, deselect Automatically join tables added to a query in Preferences > Query Builder to prevent memory issues.