The Data Filter
The Data Filter gives you a variety of ways to identify subsets of data. You can interactively select complex subsets of data, hide these subsets in plots, or exclude them from analyses.
1. Select Rows > Data Filter.
Tip: In addition to the main Data Filter, you can also launch a local Data Filter within a platform report. Click the Local Data Filter icon  from the Report toolbar, or select Local Data Filter from the red triangle menu in a report. See Local Data Filter for more information.
Figure 9.7 Initial Data Filter Window
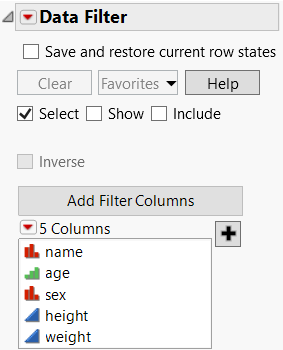
2. Select the columns that you want to use as filters, and then click Add  .
.
Notes:
• To restore your current row states when the Data Filter window is closed, select the Save and restore current row states option.
• If you have a long list of columns, you can sort, show, hide, or search for columns in the list. Use the options in the Add Filter Columns red triangle menu. See Search Filter Options for more information about refining your search.
• By default, the Data Filter window is attached to the data table. You can detach it temporarily or persistently, as follows:
– Detach it temporarily by deselecting the Use Floating Window option from the Data Filter red triangle menu.
– Detach it persistently by selecting File > Preferences > Tables and deselecting the Use a Floating Window for Data Filters option.