JSL 3-D Scene Boxes
These commands are necessary to set up and configure a 3-D scene.
Like all displays in JMP (detailed in Display Trees), 3-D scenes must be placed in a display box (in this case, a Scene Box). This box is then placed in a window. Therefore, a simple 3-D scene script has the following form.
myScene = Scene Box(300, 300); // create a 300 by 300 pixel scene box
...(commands to set up the scene)...
New Window("3-D Scene", myScene); // draw the scene in a window
...(commands that manipulate the scene)
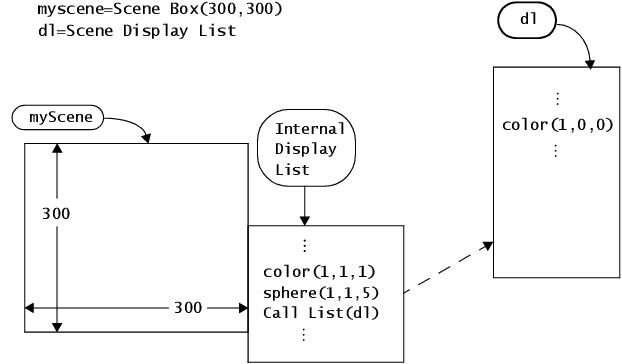
The scene can be sent messages that construct elements in the scene. Typical messages alter the viewer’s vantage point, construct physical elements in the scene itself, or manipulate lights and textures. These messages are maintained in a display list and are manipulated in one of two ways:
• They are sent as messages to the scene, which immediately adds them to the scene’s internal display list.
• They are sent as messages to a display list stored in a global variable, which is called by the scene’s display list later.
Figure 13.2 Constructing Scenes
For example, of commands sent to the scene’s display list directly, consider the following small script. Each of the commands is explained in detail later in the chapter.
scene = Scene Box( 400, 400 ); // make a scene box
New Window( "Example 1", scene ); // put the scene in a window
scene << Perspective( 45, 3, 7 ); // define the camera
scene << Translate( 0.0, 0.0, -4.5 ); // move to (0,0,-4.5) to draw
scene << Color( 1, 0, 0 ); // set the RGB color of the text
scene << Text( center, baseline, 0.2, "Hello, World." ); // add text
scene << Update; // update the scene
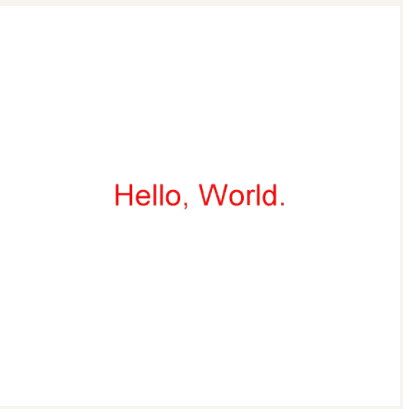
The first two lines create a scene and place it in a window. The Perspective command defines the viewing angle and field depth. By sending it as a message to the scene, it is immediately added to the scene’s display list. Because the “Hello World” text is drawn at the origin (0, 0, 0), the Translate command is added to the display list. This command moves the camera back a bit so that the origin is in the field of vision. The color is set to red with the Color command, the text is drawn, and the Update command causes the scene to be rendered (in other words, causes the display list that contains the commands to be drawn.)
Figure 13.3 Hello World
Equivalently, the commands to construct the display can be accumulated in a display list stored in a global variable, which is then sent to the scene all at once. To define a global variable as a display list, assign it using the Scene Display List function. For example, to use the global greeting as a display list, issue the command
greeting=Scene Display List();
Display commands can then be sent as messages to greeting. An equivalent “Hello World” example using a display list follows.
greeting = Scene Display List();greeting << Color( 1, 0, 0 ); // set the RGB color of the text
greeting << Text( center, baseline, 0.2, "Hello, World." ); // add text
// draw the window and send it the stored display list
scene = Scene Box( 400, 400 ); // make a scene box
New Window( "Example 1", scene ); // put the scene in a window
scene << Perspective( 45, 3, 7 ); // define the camera
scene << Translate( 0.0, 0.0, -4.5 ); // move to (0,0,-4.5) to draw
scene << Call List( greeting ); // send the display list to the scene
scene << Update; // update the scene
Note which commands were separated into the display list, and which were applied to the scene directly. Those that manipulate the camera (Translate and Rotate) are applied to the scene. Those that define the object (Color and Text) were relegated to the display list. This is done so that the display list can be called many times to replicate the object at different positions.

