Click to open the Review Builder and Select Reports... windows (shown below).
The Select Reports... window lists all of the reports that are available for analyzing the specified study. This window is used to select the reports that are to be included in the review.
Note: Normally, only those reports whose domain/variable requirements are satisfied, and therefore can be run are shown. Check the Show reports unsatisfied by the current study check box to show all reports.
8
Select the report(s) that you want to run and click .
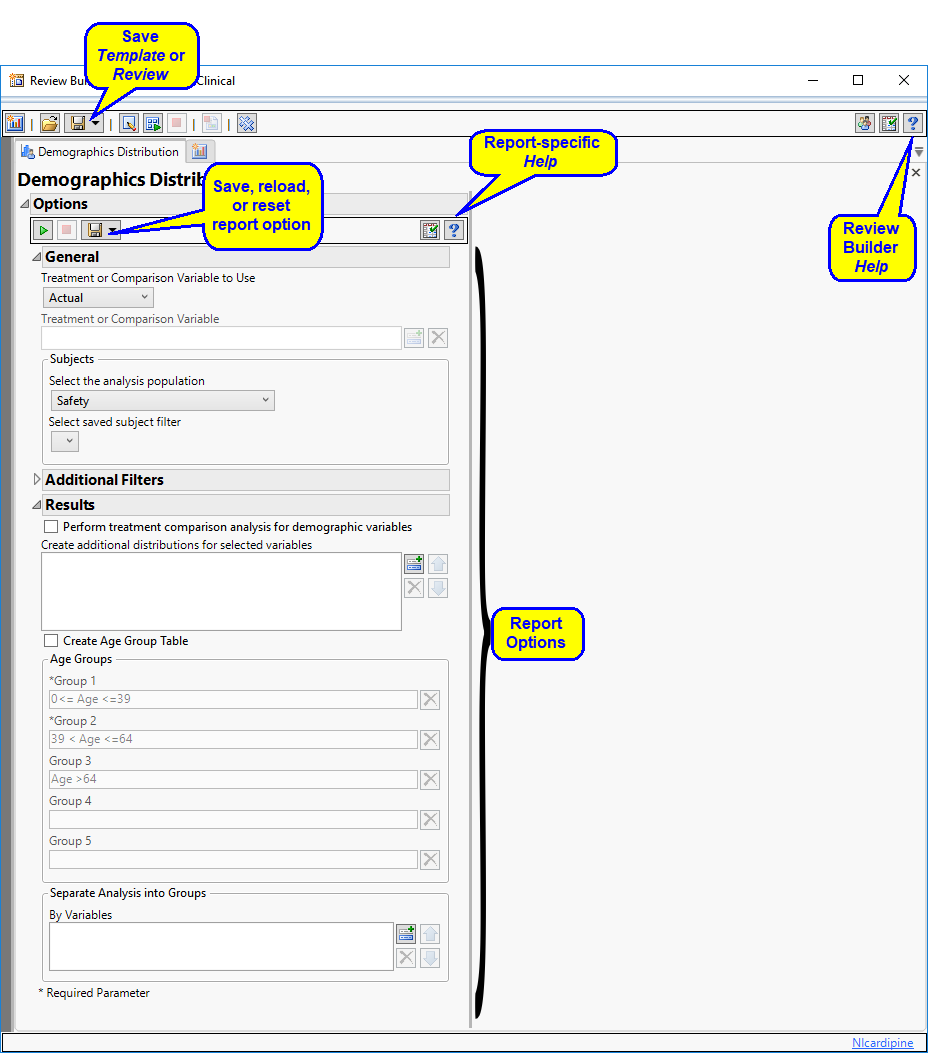
The Review Builder window contains all of the specified reports. There is a separate tab for each report. Initially, each tab lists the options for the analysis. You can accept the default settings or adjust them as desired. After the report(s) is run, results are shown in the tab.
Set Study Preferences: Click to globally set custom study-level attributes, subject-level preferences, analysis preferences for each CDISC class of reports, preferences for calculating study days, as well as preferences for advanced operations. See Set Study Preferences for more information.
•
Set Value Ordering in Studies: Click to use Set Value Order and Color in Studies to specify the order and color of values within variable specific plots, such as histograms, and tables, as well as the order of value-comparison plots and tables within output.
•
Reset All Reports:
•
Open Review Template: Click to open an existing review template.
•
Save: There are two Save action buttons. The first is a review-level option that surfaces a drop-down menu that enables you to save either the template for the current review or the review itself. The second enables you to save the current option settings as the default selections for the report, reload any saved options, or revert to the factory-specified option settings.
Create static report for Review: Click to create a PDF, RTF, or PPT version of the Review.
•
Create Live Report for Review: Click to generate a JMP Live report. Refer to Create Live Report for more information.
•
Derived Population Flags: Click to specify Derived Population Flags that enable you to divided the subject population into two distinct groups based on whether they meet very specific criteria.
•
Create subject filter: Click to generate a subject-specific filter that can be applied to all subsequent reports run for this review. Only those patients specified by the filter are carried through the analyses.
•
Manage Subject Filters: Click to open the Manage Subject Filters window
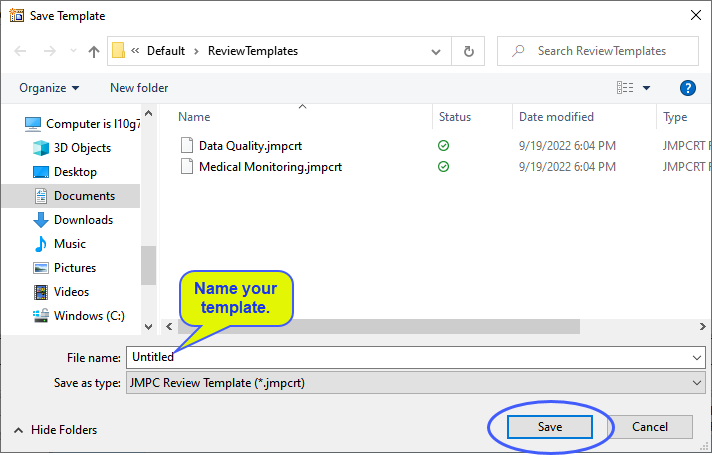
Once you have created a template for analyzing a study, you can save it for use in future analyses. This template can be reused either for the same study (when new data becomes available, for example) or for a different study, for which you want to use the same report options.
Provide a name for your template and click to template with the reports and options specified
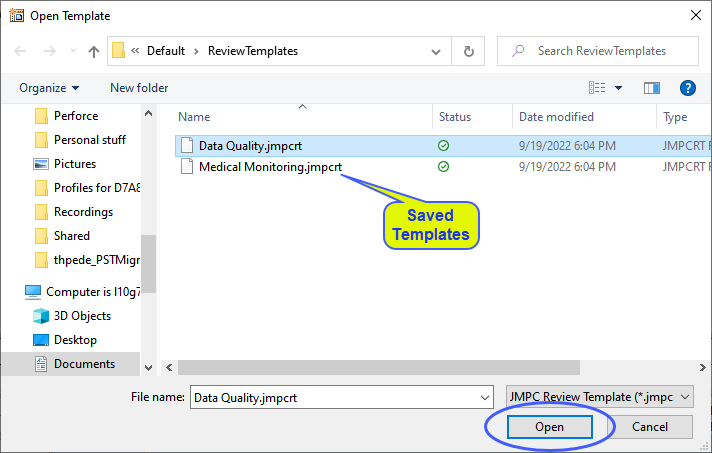
Using a Prior Template for a New Study
When you generate a review for a study, you can save the template (reports, option settings, and so on) for that review using the Save Review Template... action button (see above). Saved templates can be used again and again for new studies.
8
Make sure that the new study has been selected.
8
Click to open the Open Template window shown below:
8
Select the desired template and click to open the Review Builder window with the reports and options specified
 to open the Review Builder and Select Reports... windows (shown below).
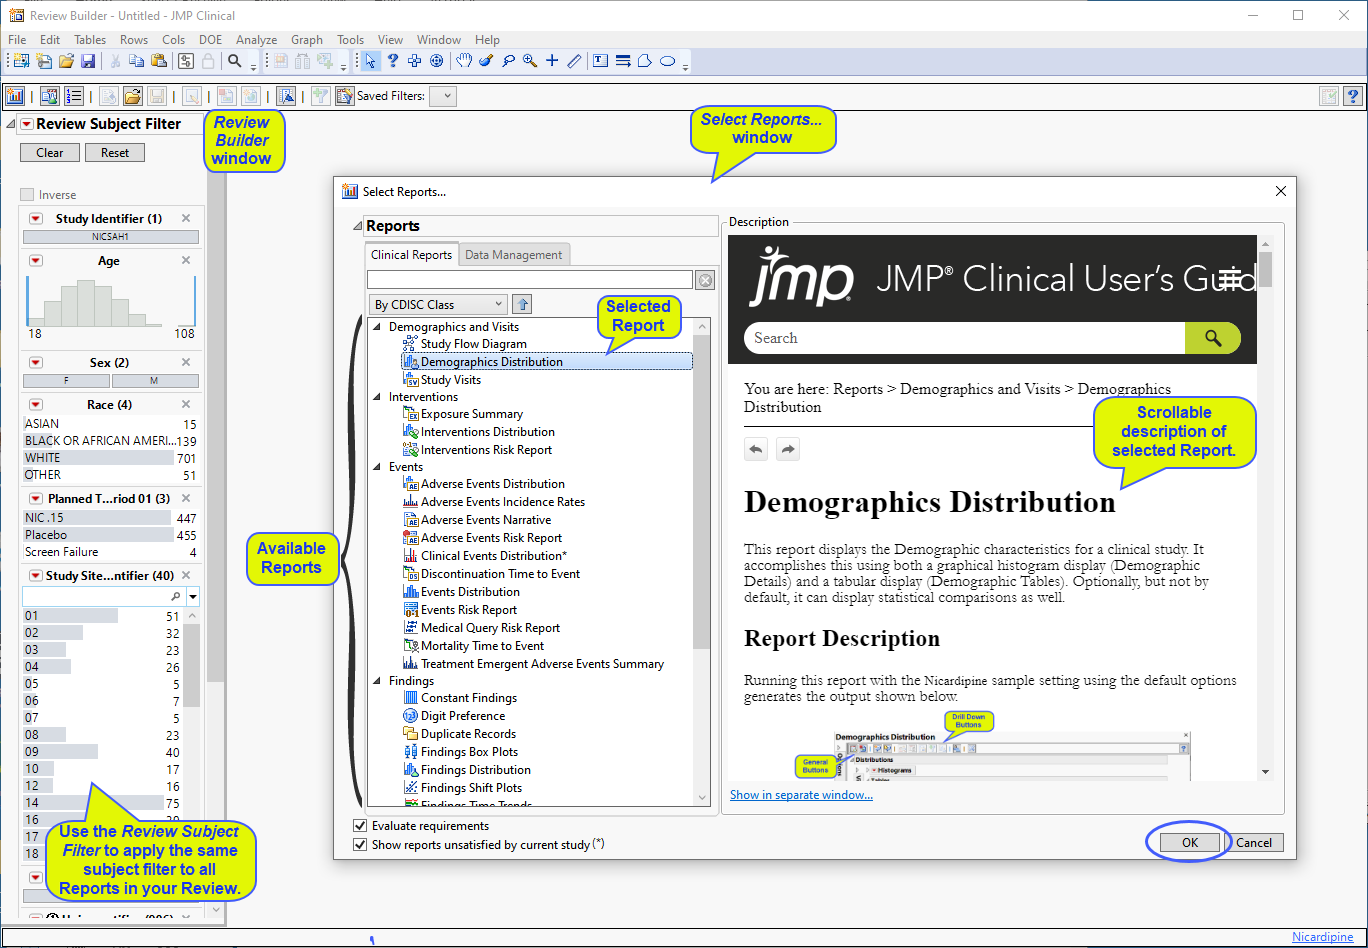
 to add a report to the review.
 to globally set custom study-level attributes, subject-level preferences, analysis preferences for each CDISC class of reports, preferences for calculating study days, as well as preferences for advanced operations. See Set Study Preferences for more information.
 to use Set Value Order and Color in Studies to specify the order and color of values within variable specific plots, such as histograms, and tables, as well as the order of value-comparison plots and tables within output.
 to open an existing review template.
 action buttons. The first is a review-level option that surfaces a drop-down menu that enables you to save either the template for the current review or the review itself. The second enables you to save the current option settings as the default selections for the report, reload any saved options, or revert to the factory-specified option settings.
 to reorder, duplicate, or delete reports. You can also apply a saved subject filter2 to all reports in the review.
 to create a PDF, RTF, or PPT version of the Review.
 to generate a JMP Live report. Refer to Create Live Report for more information.
 to specify Derived Population Flags that enable you to divided the subject population into two distinct groups based on whether they meet very specific criteria.
 to generate a subject-specific filter that can be applied to all subsequent reports run for this review. Only those patients specified by the filter are carried through the analyses.
  to open the Manage Subject Filters window
  to open the Check Variable Requirement and Usage window.