View Notes
The View Notes option provides a customized context-specific display of Clinical notes.
| 8 | Click  to open the Notes... window: to open the Notes... window: |
The context of a note is determined both by the report and the table in which selections are made. There are seven note contexts, which are summarized in the following table:
|
Context |
Examples of how notes in this context can be added or viewed: |
|||
|
Current Report |
|
|||
|
Selected Subjects |
|
|||
|
Site Level |
|
|||
|
Country Level |
|
|||
|
Record Level |
|
|||
|
Specific Domain |
|
|||
|
Selected Notes |
|
 (
( (
( (
( (
( (
( (
( (
( (
( (
( (
( (
( (
( (
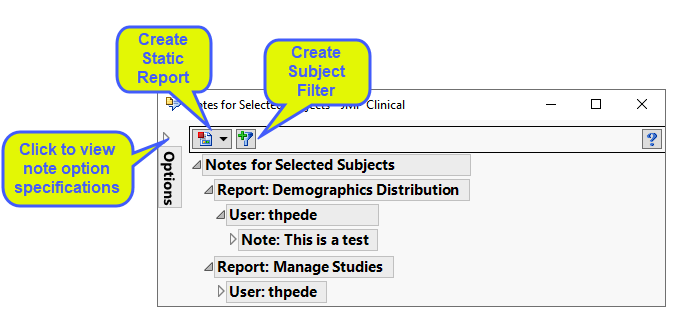
(Once  is clicked, a summary of the notes is surfaced, in the last saved customization (or in the factory default view, if no customization has been saved). Click
  to save a static copy of the notes summary in one of several formats.
For notes, with at least one subject selected, you can click  to create a data filter for the selected subjects.
Customizing the Appearance of the Notes Summary
| 8 | Click the Options tab to expand the dialog and reveal both Action buttons and column- and row-specific options. |
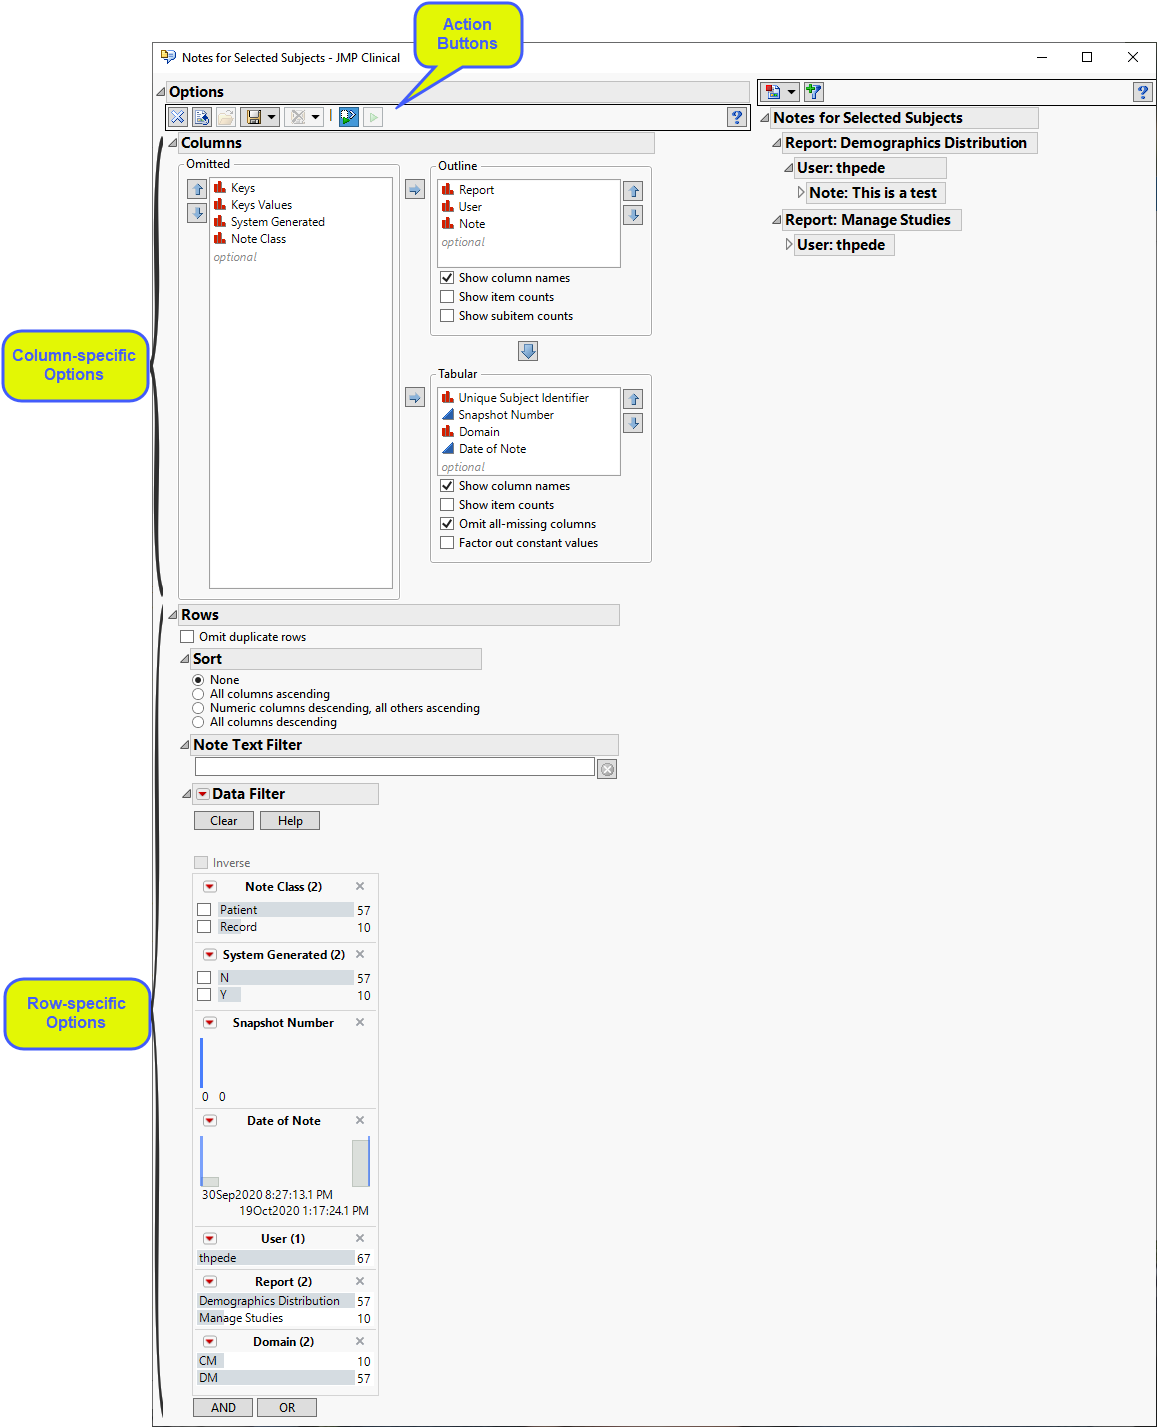
Action Buttons
| • | Clear: Click |
| • | Reset: Click  to revert all options to the factory default state for the current context. to revert all options to the factory default state for the current context. |
| • | Load: Click  to recall a saved setting. to recall a saved setting. |
| • | Save Options…: Click  to save a customization for either the current context only, or across all contexts. to save a customization for either the current context only, or across all contexts. |
| • | Delete Saved Options…: Click  to delete a saved customization in either the current context only, or for all contexts. to delete a saved customization in either the current context only, or for all contexts. |
| • | Turn on/off auto-run: causes any option change to immediately update the notes summary. Clicking  will require that you click will require that you click  upon every desired notes summary update. Clicking upon every desired notes summary update. Clicking  will automatically run notes summary updates. On provides convenience while off prevents long delays when changing options for very large notes sets. will automatically run notes summary updates. On provides convenience while off prevents long delays when changing options for very large notes sets. |
Columns
Each note context offers a different set of columns from which you can choose to display in an Outline role, a Tabular role, or to omit. Click to select column(s) and use the arrow buttons to move them to different roles. The order within Outline roles is from highest to lowest outline level. The order within Tabular roles is from left to right within each table.
The Column options are described in the following table:
|
Role |
Options |
|||
|
Outline |
|
|||
|
||||
|
||||
|
Tabular |
|
|||
|
||||
|
||||
|
Rows
This section enables you to sort and filter the note summary.
The Rows functions are described in the following table:
|
Function |
Options |
||||||
|
Sort |
|
||||||
|
|||||||
|
|||||||
|
|||||||
|
Note Text Filter |
|
||||||
|
Data Filter |
Note: You must select at least one row, point, bar, and so on, for this option to become active.
|